27-step email marketing checklist for more impactful campaigns
 Duncan

We’ve chosen the tips in this list to help you take the right action in every part of your campaign. We wrote it with beginners in mind, but anyone who wants to use relevant best practices when sending emails will benefit.
Onto the list! 👇
27-step email marketing checklist
We’ve split the 27 steps on our email checklist into five sections. Here’s a look at what each one contains:
The pre-deployment checklist includes the steps you should take while planning your strategy
The campaign content checklist helps you create optimized emails people respond to
The deliverability checklist maximizes the chances of your messages landing in the inbox
The technical QA checklist ensures all the technical elements of an email marketing campaign are in place
The compliance checklist ensures you send messages in a way that complies with major anti-spam and privacy regulations
First up, let's take a look at the pre-deployment checklist.
Email pre-deployment checklist
The section is stuffed full of tips that will help you get your email marketing off to a smooth start.
1. Define your email marketing KPIs
Step one is to think about why you want to start email marketing and define the metrics that will tell you if your campaigns are working.
Typical goals include improving conversion rates, generating e-commerce sales, building stronger relationships, and increasing brand visibility.
Once you have your goal, define the KPIs that will show how your efforts are paying off. Here’s a look at which KPIs you can check for each of the above goals.
Improving conversion rates: Conversion rate or metrics related to a specific action, such as the number of sales calls organized or free trials started
Generating e-commerce sales: Total sales, order value, revenue
Building relationships: Open rate, click-through rate, repeat sales
Increasing brand visibility: Subscriber growth, successful referrals
Read more about how to choose email marketing metrics in this article.
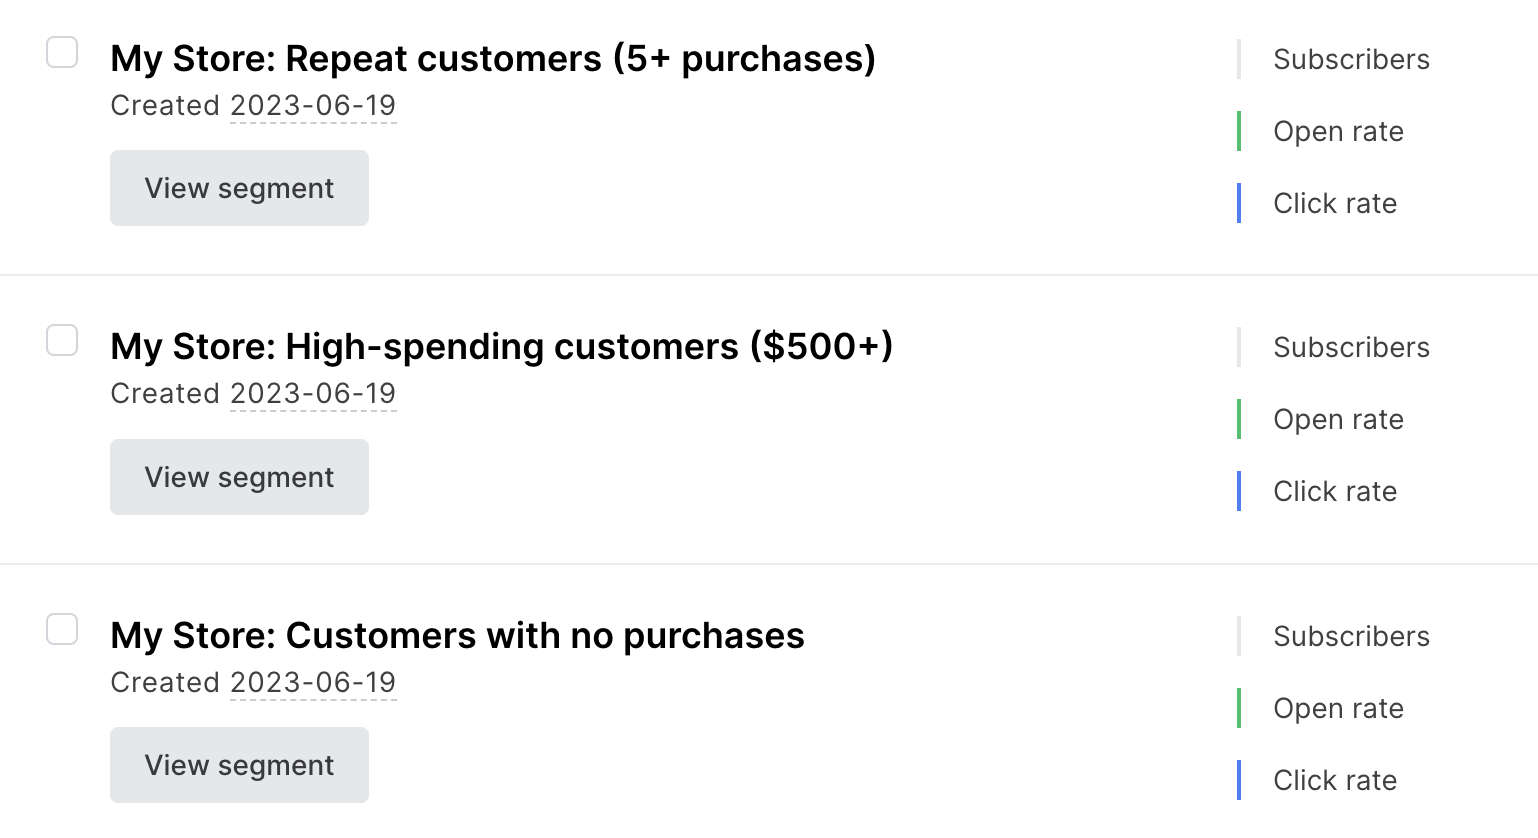
2. Create subscriber segments based on key characteristics or behaviors
Segmentation is when you group subscribers based on common characteristics or behaviors. This could be their location, how they joined your list, spending habits, campaign interaction, or other data in your profile.
Once you’ve created segments, design campaigns that are better targeted at the needs of each one. For example, an e-commerce store could segment subscribers based on their purchases. When you do this, you’ll typically see improved engagement as people receive content that better meets their needs.
If you already have a list of subscribers, you can start segmenting them right away. If you’re just getting started, consider the types of segments that will be useful for your business and how you can collect this data, such as by adding fields to your signup form, including surveys in your campaigns, or tracking the links that subscribers click on.
3. Add “From” details so people can identify your emails
Adding a sender address and sender name to your emails makes it clear to subscribers where the message came from which can help you stand out in the inbox.
When adding your address, make sure you use one from your domain rather than from a free service like Gmail or Yahoo. This will improve your branding while optimizing deliverability.
There are several strategies you can use when adding your name, the most common are:
Use your name or business name: MailerCheck
Use the name of someone at your business: Duncan from MailerCheck
Use the name of your business plus team: Team MailerCheck
How you set this up will depend on your email marketing platform. You can usually find the option in the settings section of your profile.
Most email service providers will also let you change this information for each campaign, but defining your default information before you start sending will save time.
4. Authenticate your domain so inboxes trust your messages
Authenticating your domain shows inbox providers that your emails can be trusted which can help with deliverability. Do this by adding DKIM and SPF entries to your site’s DNS entries.
It sounds complicated but it’s relatively easy. Your email marketing service should provide information about how to do this for various domain hosting services.
If you’re using a free domain from a service provider like Gmail or Yahoo (eg. [email protected]) we highly recommend buying and authenticating your own domain. This is easy to do with domain registrars like GoDaddy or Namecheap and it can cost as little as a few dollars per year.
While authenticating your domain, also consider adding a DMARC record. This protects your domain from spoofing and phishing email attacks by telling the receiving mail server how to handle email messages claiming to be from the domain.
You can then set up DMARC reporting to get instant notifications about potential sending issues so you can take action to solve the problem.
Upcoming bulk sending requirements from Google and Yahoo will require senders to use an authenticated domain. This means you’ll no longer be able to send emails from free domains. Find out more about Google and Yahoo’s upcoming requirements here.
5. Identify the most effective types of emails
There are two types of emails you can send: Campaigns and automations. Each has a different use case and you should choose the ones that best align with your business goals. Most businesses will use a combination of the two.
Campaigns (or newsletters) are emails that you send on a regular schedule to your entire list or list segments and that typically include time-sensitive information.
This could be:
An e-commerce store sending new products or sales
A media publication sending new blog posts or articles
A software tool sending product updates and helpful blog posts
A services business or freelancer sending thought-leadership posts
These campaigns are an effective way to keep in touch with your target audience and build relationships over the long term. When planning campaigns, think about the types of content that would interest your subscribers while helping you hit your goals.
Automations are emails that go out at specific points in the customer journey without you having to lift a finger. The idea is to streamline customer interactions by providing information that can promptly lead to a sale.
This could be sending:
A welcome email to people who join your list
A discount coupon to people who join your store
An onboarding sequence to people who sign up for your software
Reminder messages to people who abandon cart
Upsells or helpful content to people who buy specific products
The key is to discover which points in the customer journey could benefit from automation. Then you can identify the relevant triggers, such as making a purchase or filling in a form, and create emails that help streamline the interaction.
Campaign content checklist
This section of our email marketing checklist contains tips that will help you create engaging campaigns your subscribers can’t wait to receive.
6. Write engaging subject lines
Subject lines are your opportunity to grab the recipient’s attention in a crowded inbox. When writing your subject line, choose one that makes it clear why the person should open your email.
Best practices to make your subject lines stand out include:
Keep it under 40 characters so it displays in full on mobile devices
Experiment with personalization such as adding the recipients’ names
Use A/B testing to see which option out of multiple subject lines works best
Experiment with adding numbers or emojis
If you’re unsure about how to write a great subject line, head to your email inbox and look at the types of subject lines that the brands you like use. You can also check out this guide to writing great subject lines for more inspiration.
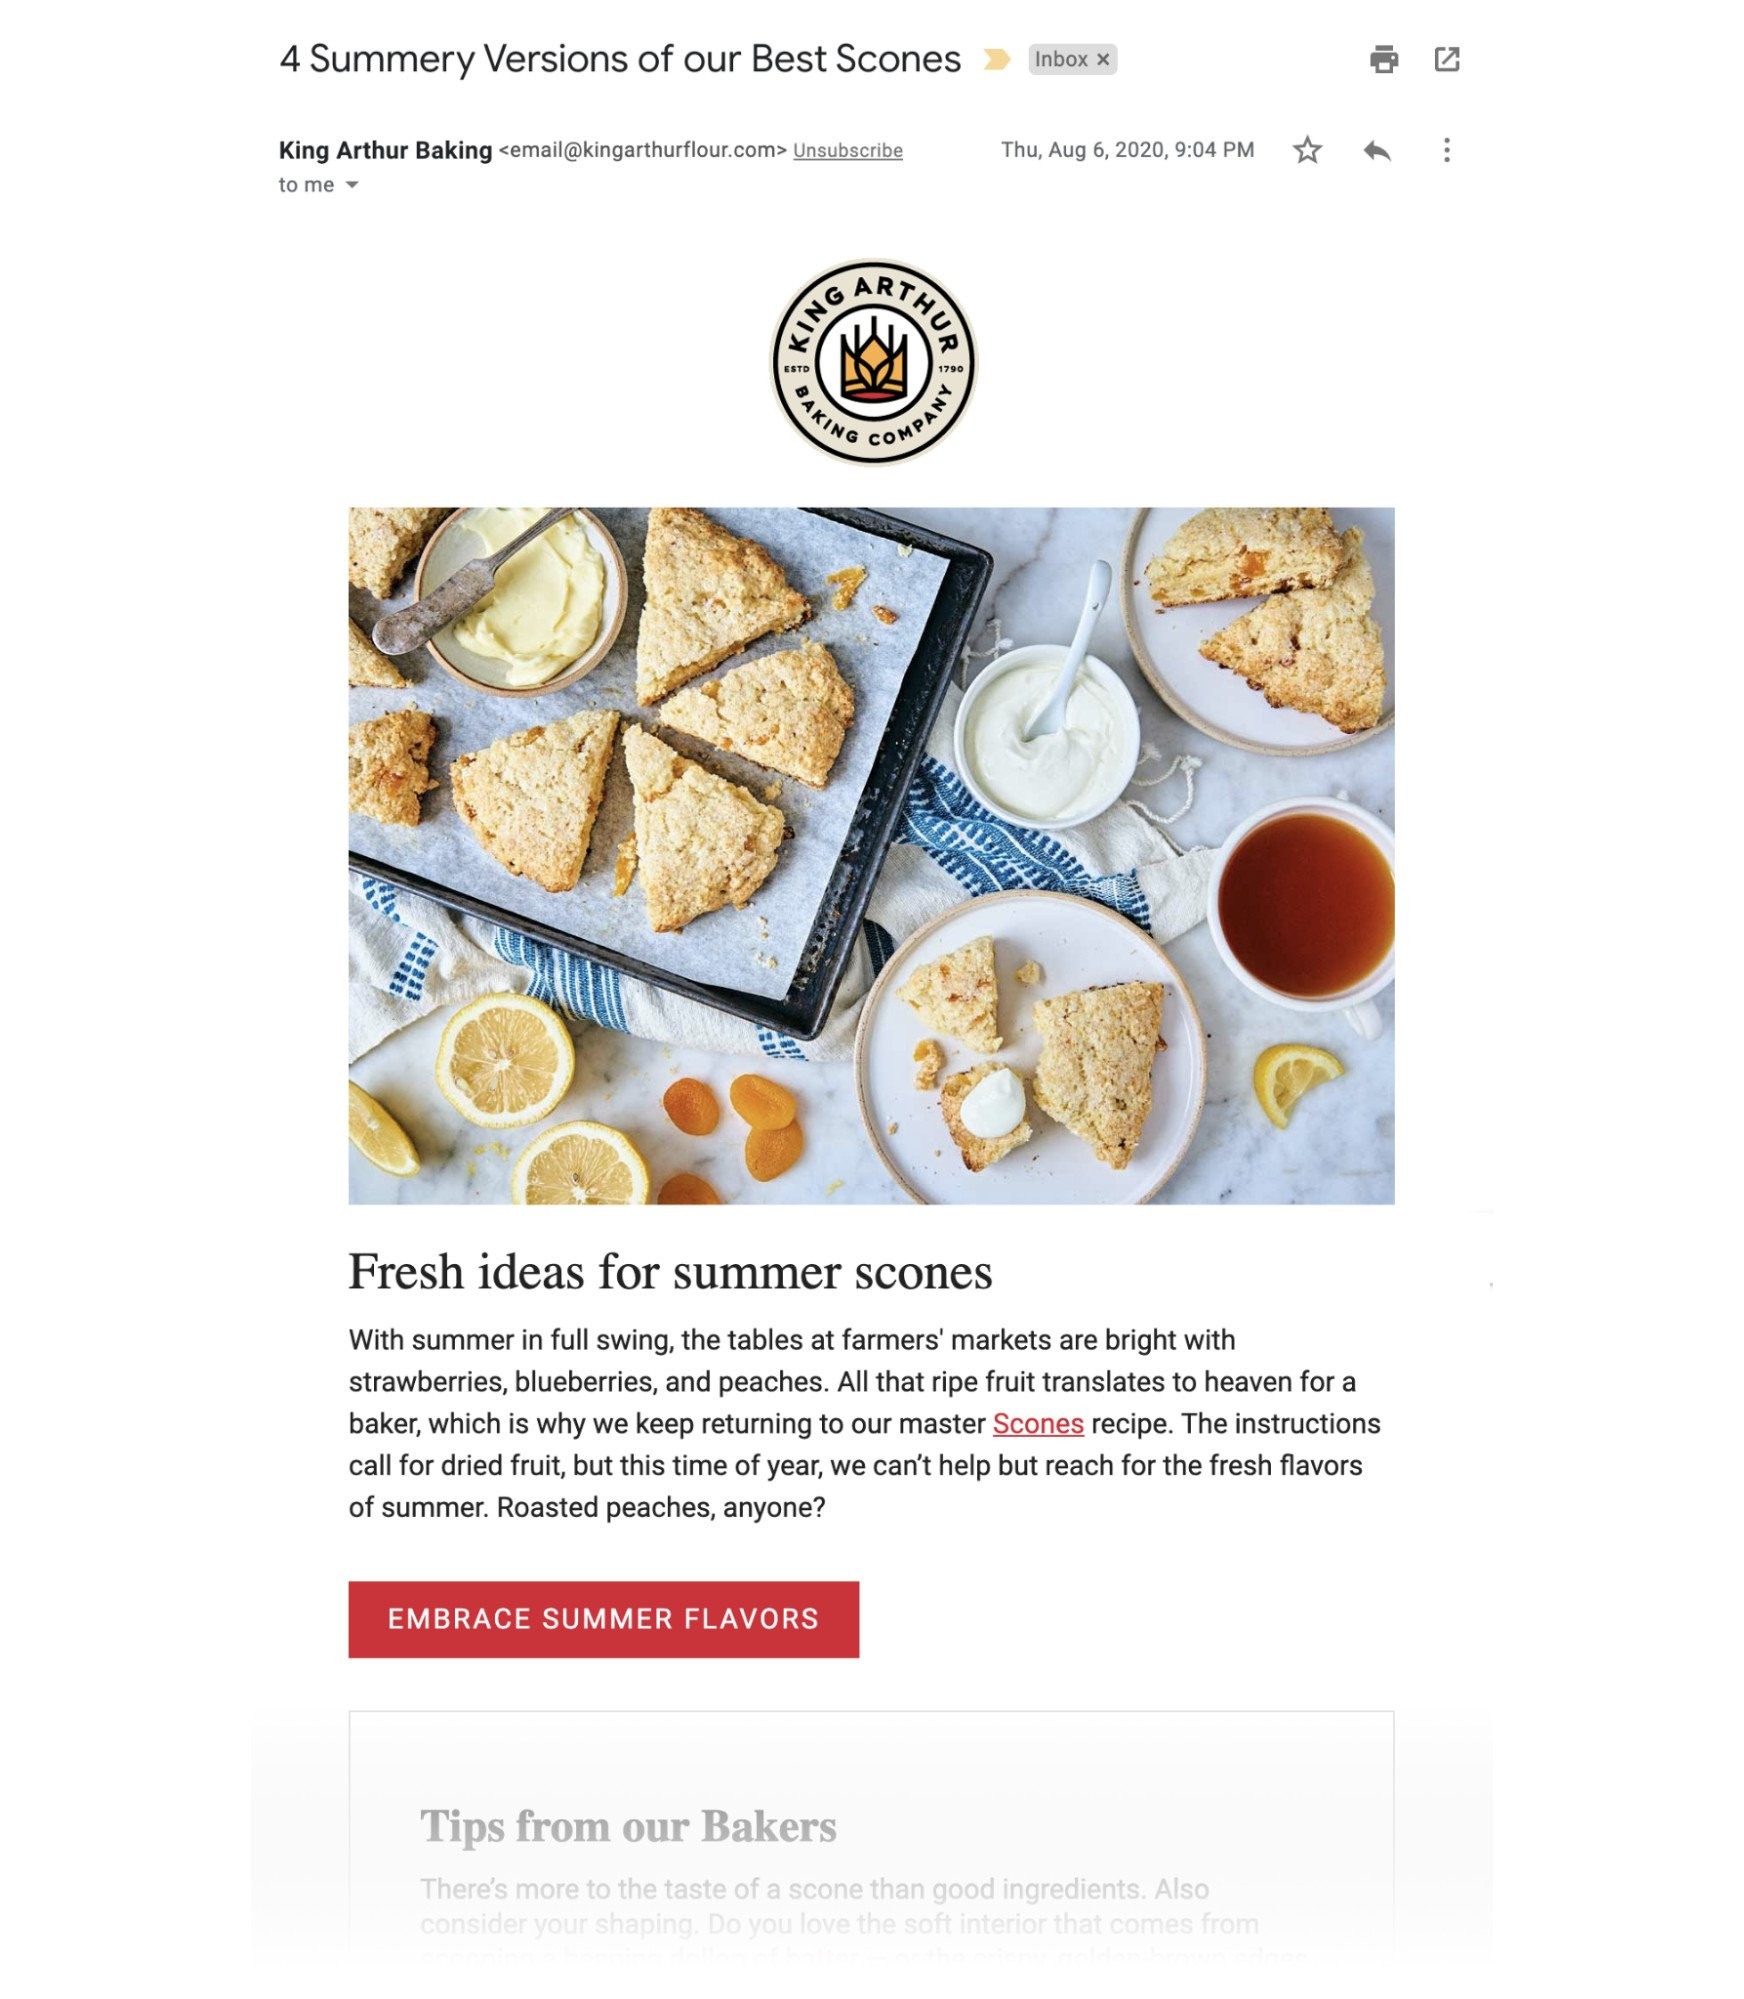
7. Don’t forget about your preheader
An email preheader is the text you can see below or next to the subject line. It typically builds on the information in the subject line and provides more context about the email contents. Use this text to further clarify why the reader should open your email.
See some examples of email subject line, sender name, and preheader combinations in the screenshot below.

8. Include compelling CTAs
If you want your reader to do something, make it clear with a call to action (CTA) in your email. Design the CTA button using a prominent size and color, along with CTA button text that starts with an action word like the example below.
9. Personalize your emails where relevant
Personalization is when you tailor parts of your email to the recipient using tags that correspond to data you have saved in their profile.
The most common method of personalization is to add the recipient’s name to the email. But you could also use their location, industry, company name, or any other data point you have access to. This makes your emails feel more personal, which can lead to greater opens, clicks and conversions.
You can take personalization further by adding dynamic content blocks to your messages that are only seen by specific customer segments. For example, an e-commerce store could add a special offer for people who have yet to make a purchase.
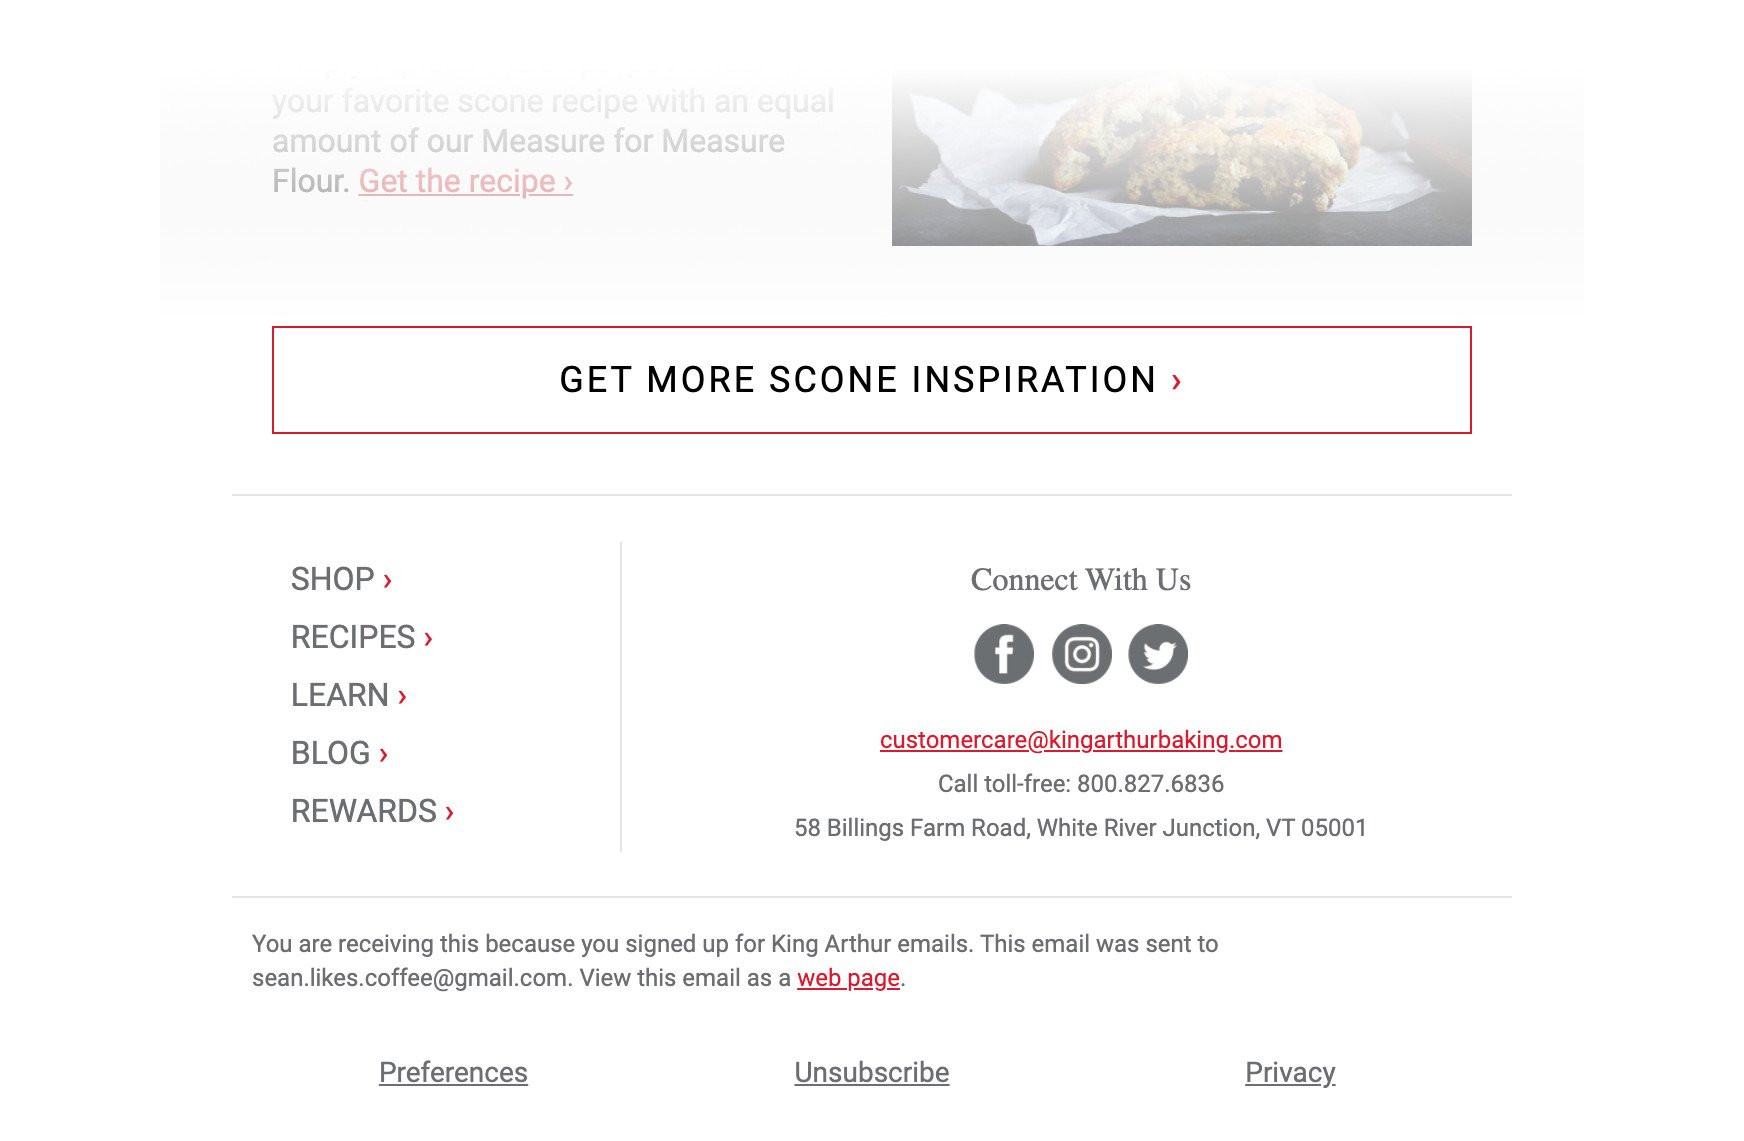
10. Create an optimized email footer
Your email footer is the section at the bottom of your email after your main content. It will typically be the same on every email, so it’s worth spending time to get it right.
You’ll need to include an unsubscribe link and address to stay compliant with privacy and spam regulations. You can optimize your footer further by adding social links, links to important parts of your website, or other ways that people can contact you. Check the image below for a good example of an email footer.
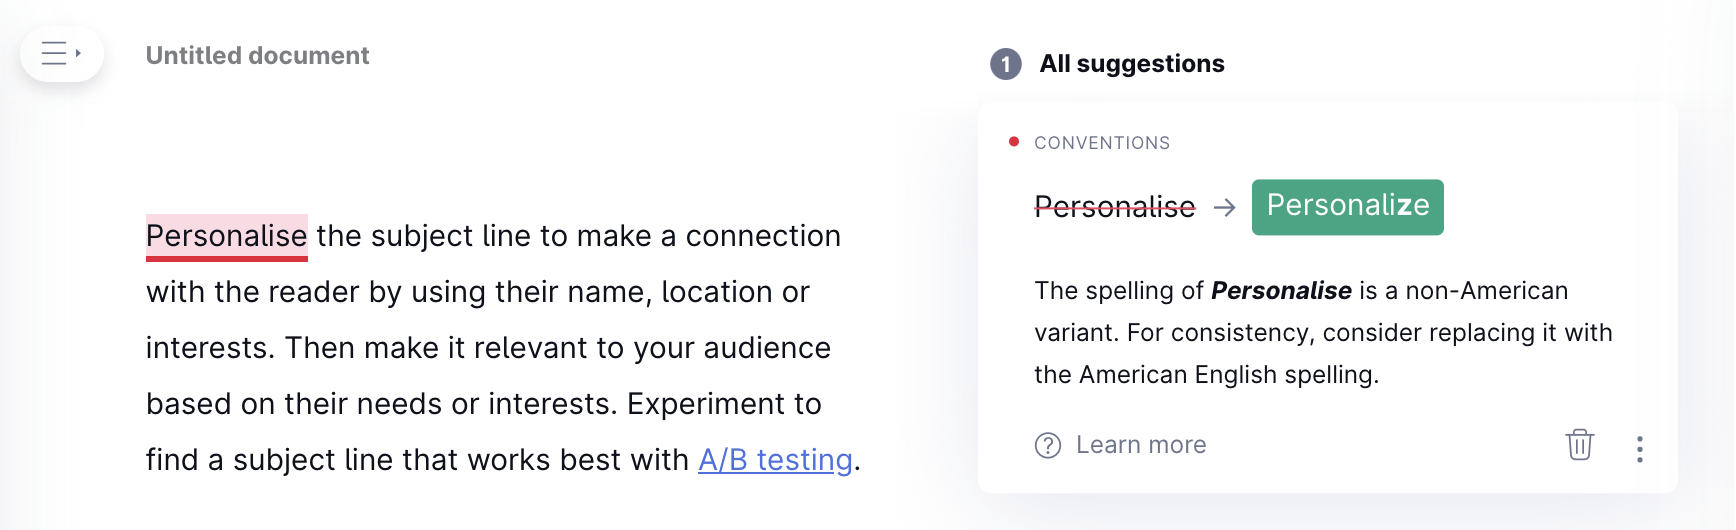
11. Proofread your email
Before finalizing your email content, check through it one last time to make sure it’s all correct. Proofread the spelling and grammar of your email copy to check it reads well. You can use tools like Grammarly (shown in the image below) or the Hemmingway App to see where you can improve.
12. A/B test your messages to see what works
Consider testing your email with either A/B or multivariate tests.
A/B testing lets you pit two versions of a single element against each other. Your email service provider will send the two versions to a small segment of your list and then send the one that performs best to the rest of your contacts.
Multivariate testing takes this up a notch by letting you test multiple elements at once. For example, you could test versions of your subject line and your email content to see which results in the most clicks.
Deliverability checklist
Even the most well-planned email campaign will fail if your messages land in the spam folder. This deliverability checklist contains steps you can take to ensure your emails get seen.
13. Verify your list
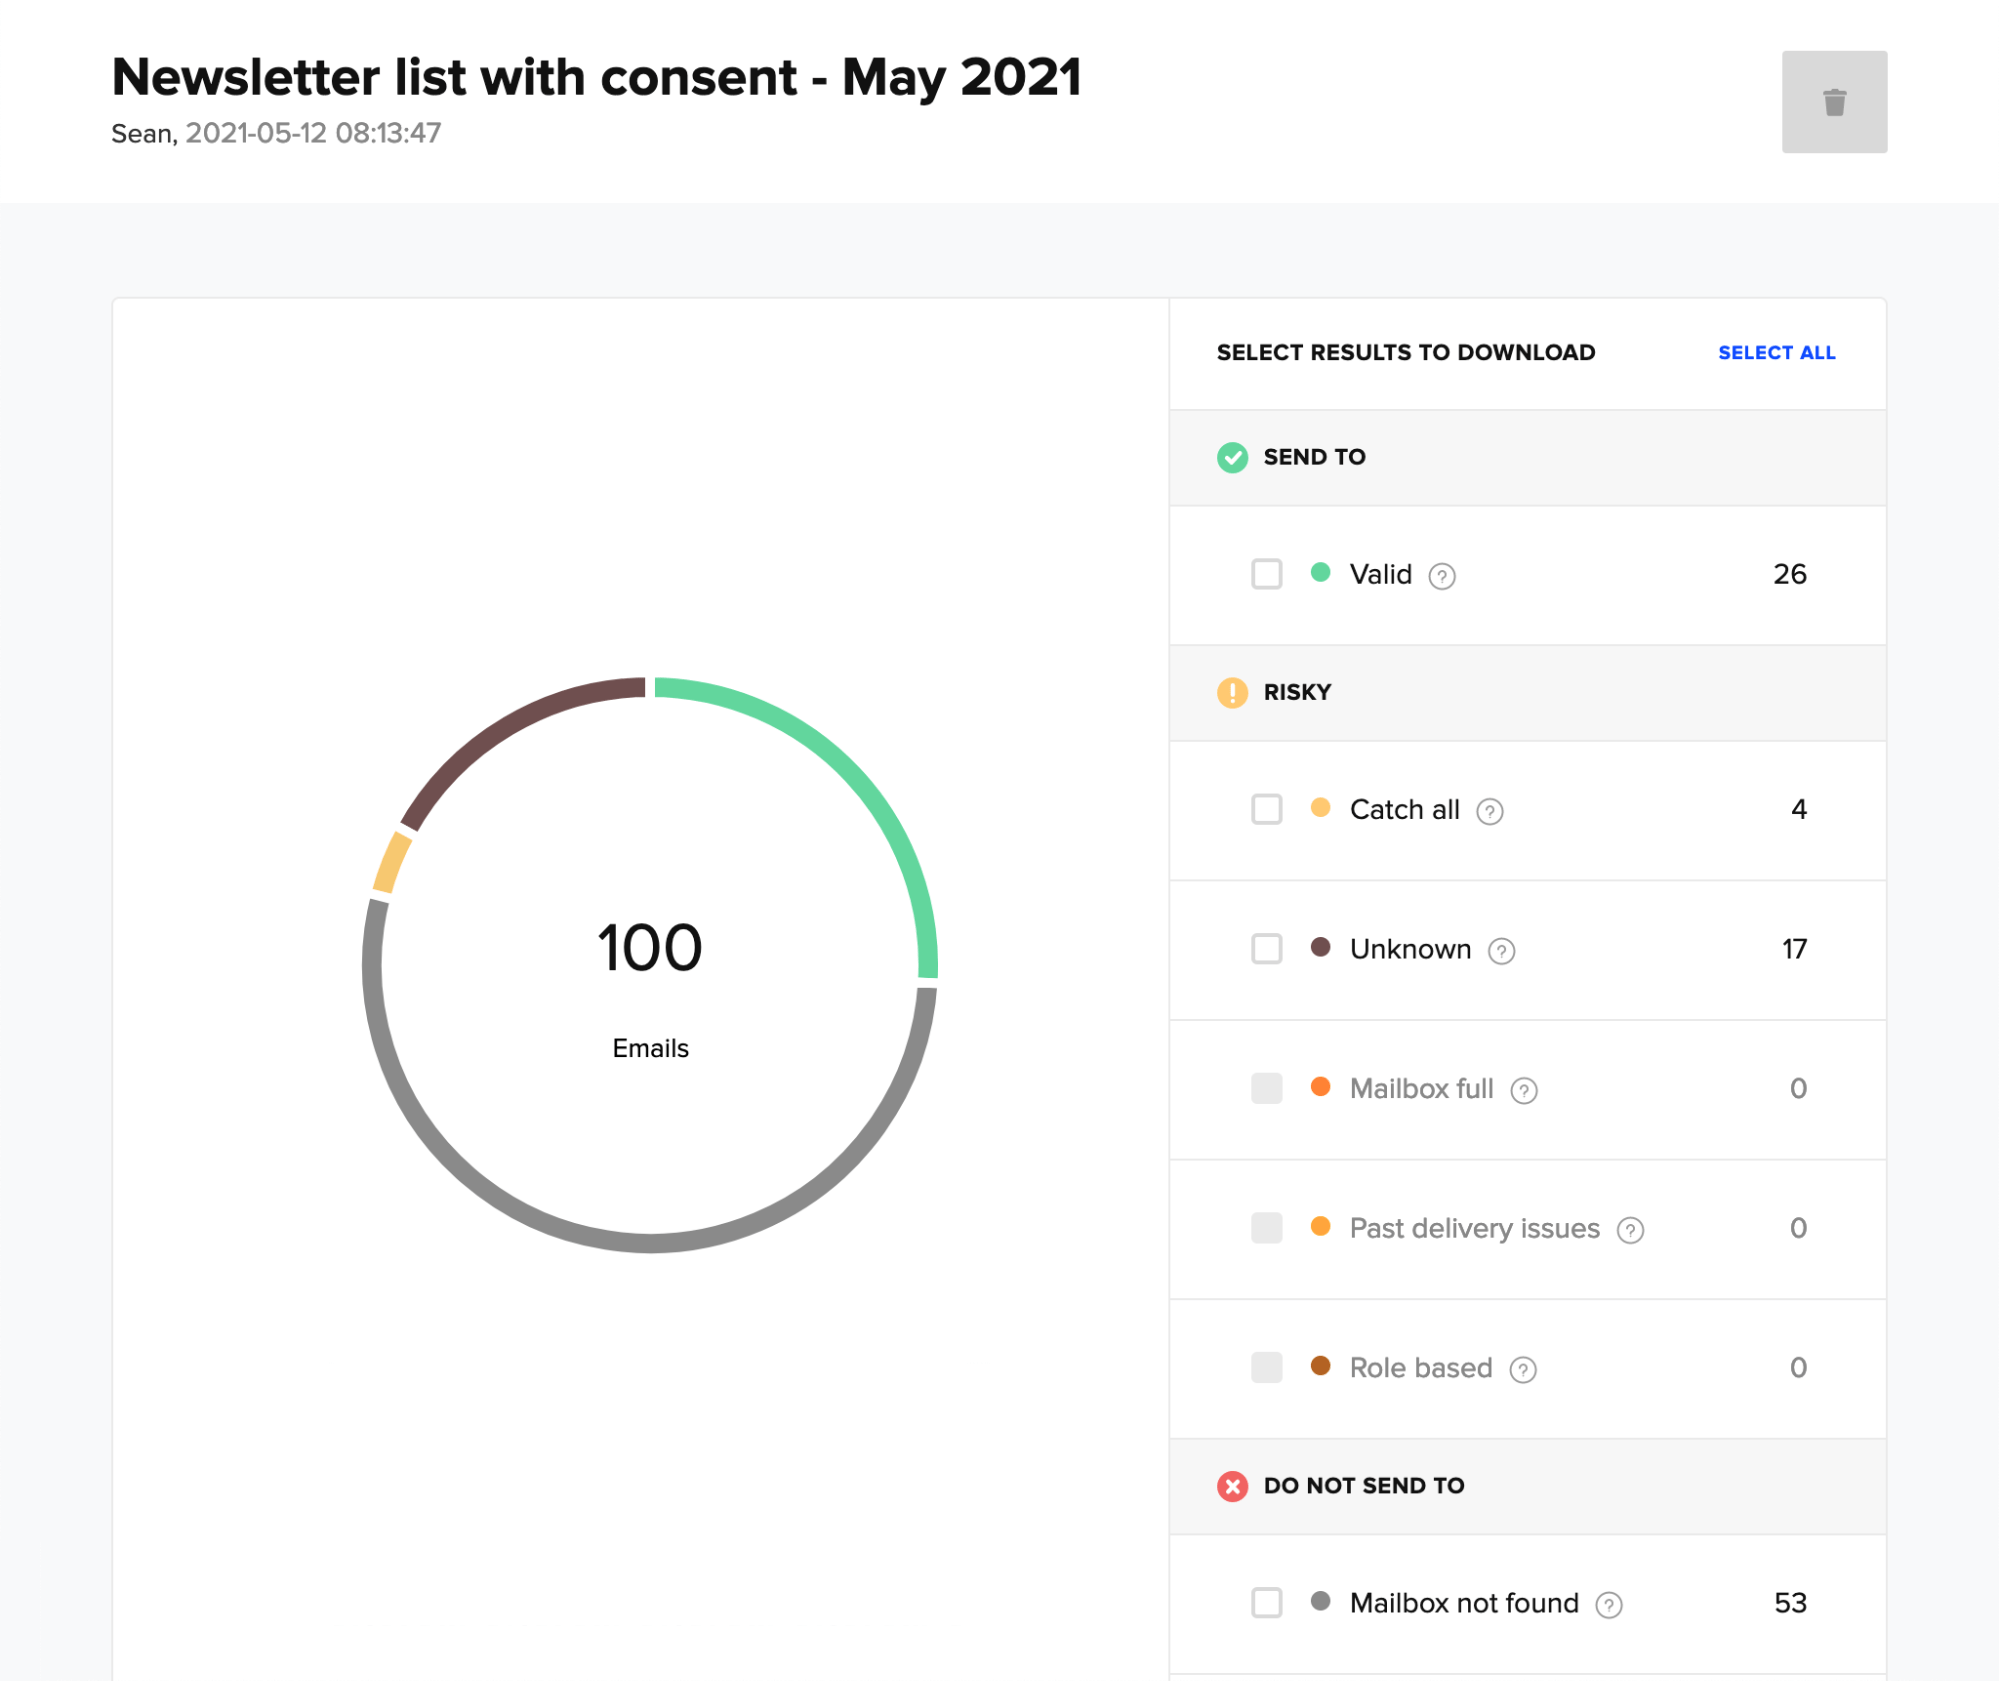
This is when you check that all the email addresses on your email list belong to real, high-quality accounts. It’s important because over time you’ll pick up low-quality email addresses such as spam accounts, role-based emails, or simply those with typos.
Sending to these addresses can cause your emails to bounce or be ignored, which can impact your sender reputation and cause future deliverability problems. Your email marketing metrics will also improve when you remove these addresses from your list as you’ll be sending to real people who value your messages.
Use a tool like MailerCheck to clean your list of invalid email addresses. Or you can set up real-time verification and 2-step authentication to stop low-quality addresses from landing on your list in the first place.
14. Image ALT text
Adding alt text to your images helps ISPs understand the relevance of the image which can help with deliverability. Most email service providers make it easy to add this text via the image settings in the email builder. When adding text, simply write a short description of what the image contains.
Image alt text also provides context to screen readers, which lets them relay information about the image to people who use these devices. Your messages will be more accessible which increases the number of people who can read them.
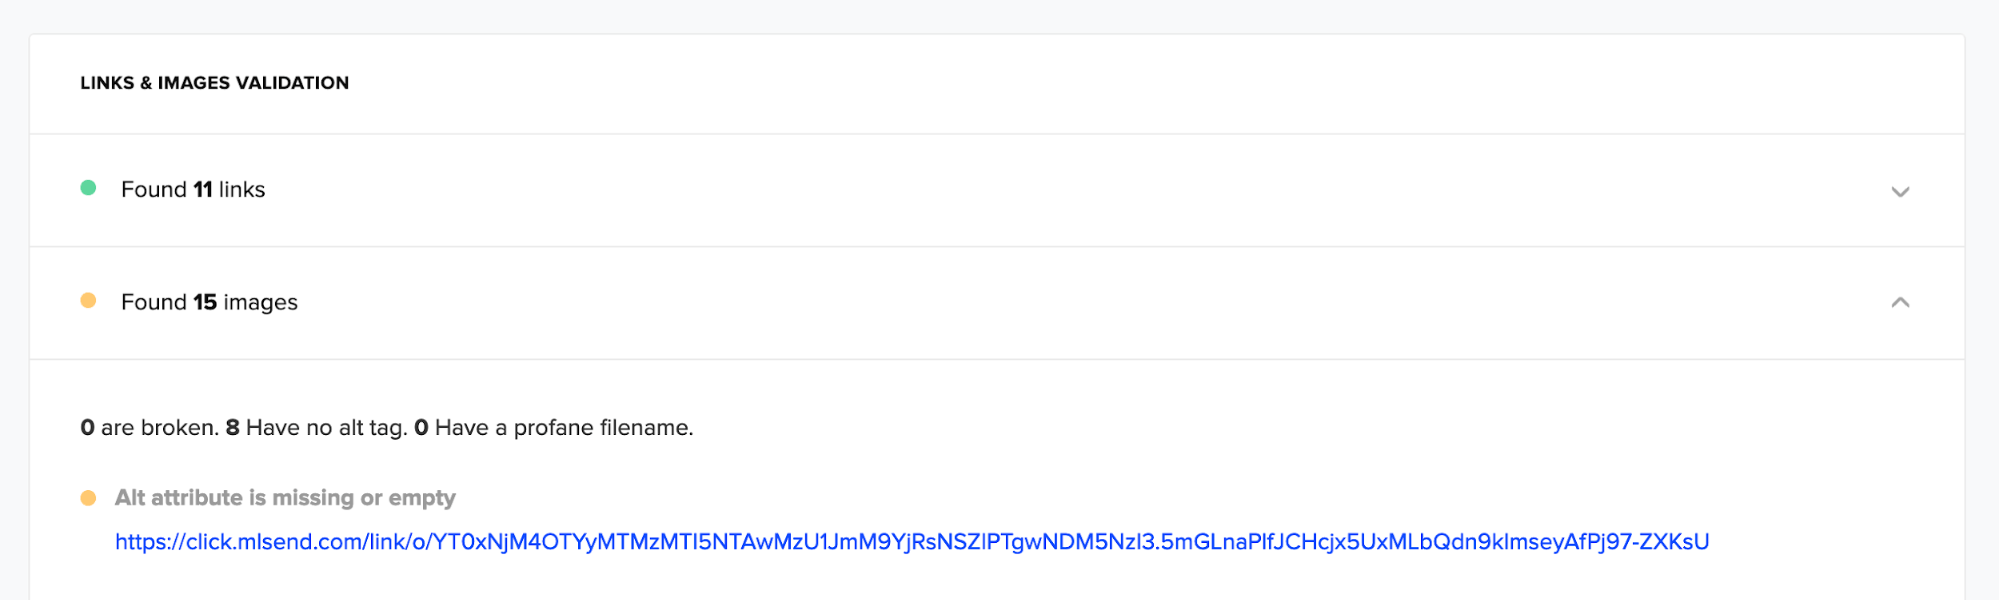
15. Check your links
Ensure that each of the links you add to your email opens to the right page for an optimal customer experience. You should also avoid using link shorteners or linking to problematic websites so your messages are less likely to be caught by inbox providers’ spam filters.
MailerCheck's Inbox Insights feature will check all your links and images for issues so you can send your campaigns in confidence.
16. Spammy words and symbols
Did you know that your email content can impact whether your email goes to the spam folder?
Using words that inbox providers have decided are spammy, such as “100% free” and “Click here,” can see your messages banished. WRITING IN ALL CAPS, and excessive use of exclamation marks‼️ can also cause issues.
When checking your emails, consider whether you are pushing too hard for a sale. If you are, it might be worth toning down your language and focusing more on the customer experience.
You can also use MailerCheck’s Email Insights tool to analyze your email content and identify problematic phrases.

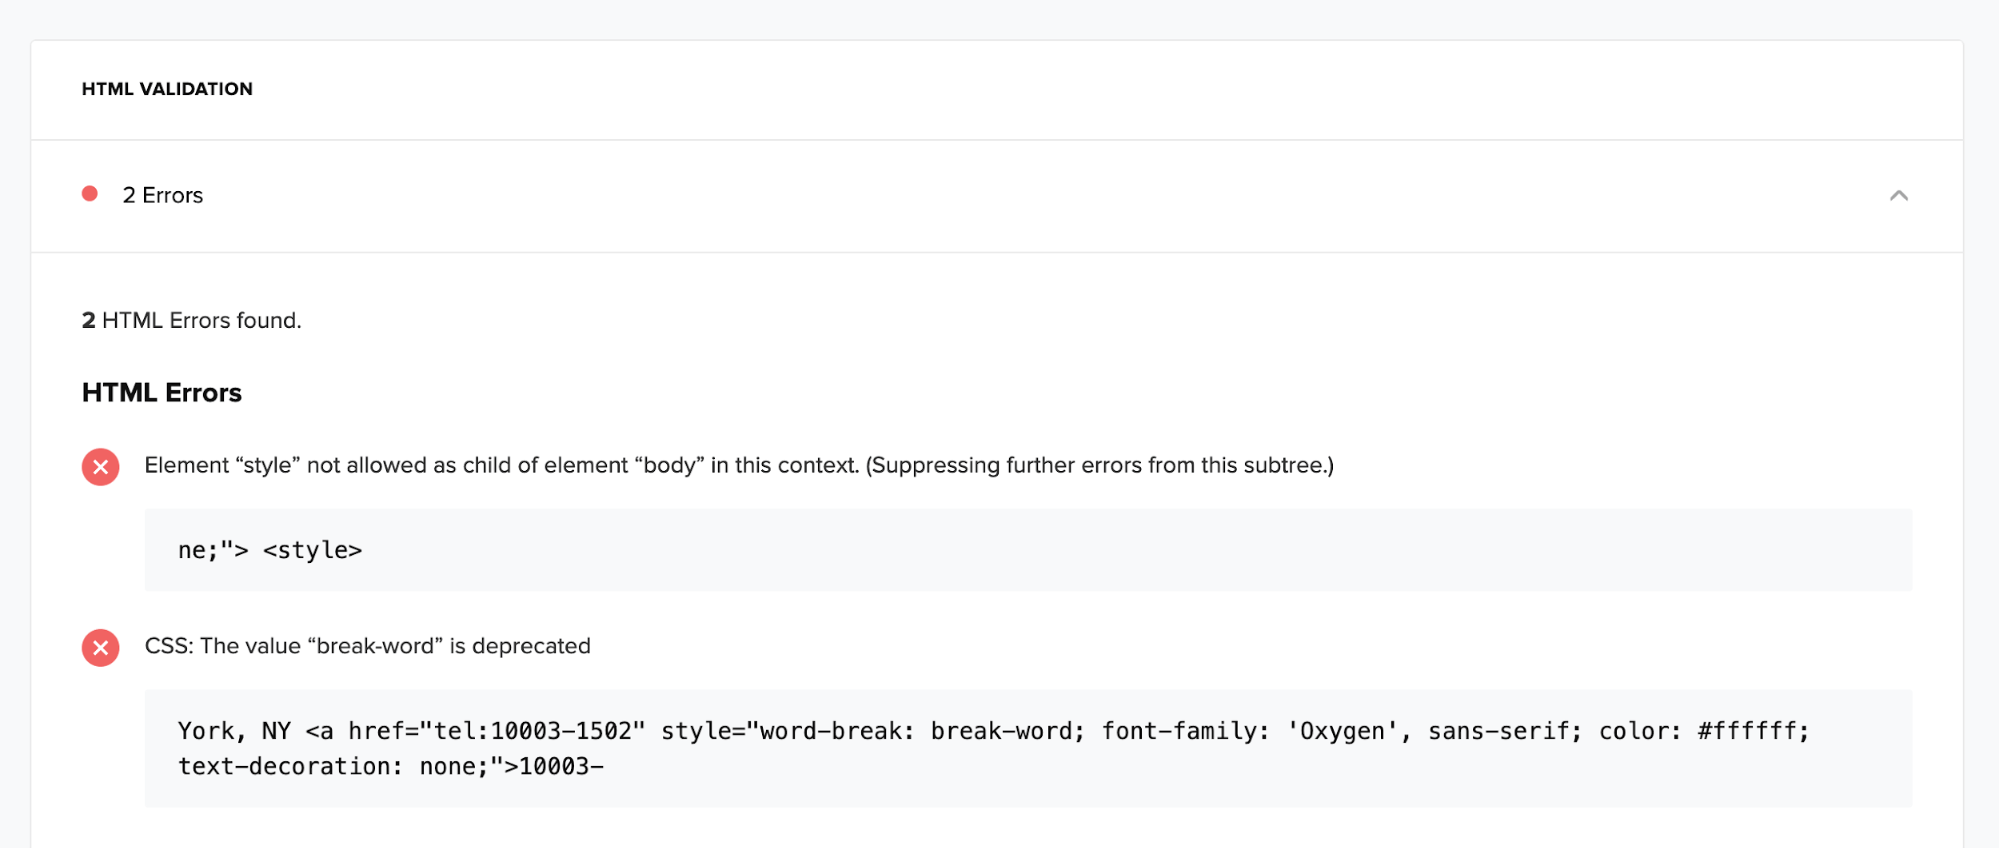
17. Check HTML
HTML emails can display differently depending on the browser, device or operating system they’re opened on. Poorly formatted code can trip up email clients, so remove any surprises by analyzing your HTML with Inbox Insights to discover issues.
18. Test Inbox placement
Once you’ve optimized for email deliverability, all that’s left is to test that your campaign lands in the main inbox.
MailerCheck's Inbox Placement tool will send test emails and identify whether the mail lands in the inbox or the spam folder of Gmail, Outlook, Yahoo and AOL inboxes.
If there are issues with your campaign, the tool will highlight improvements you can make to increase the chances of the message passing spam filters.
Technical QA checklist
This section of our email marketing checklist contains steps you can take to ensure the quality of your campaigns. Follow these tips to send emails that work and are readable for the largest number of subscribers.
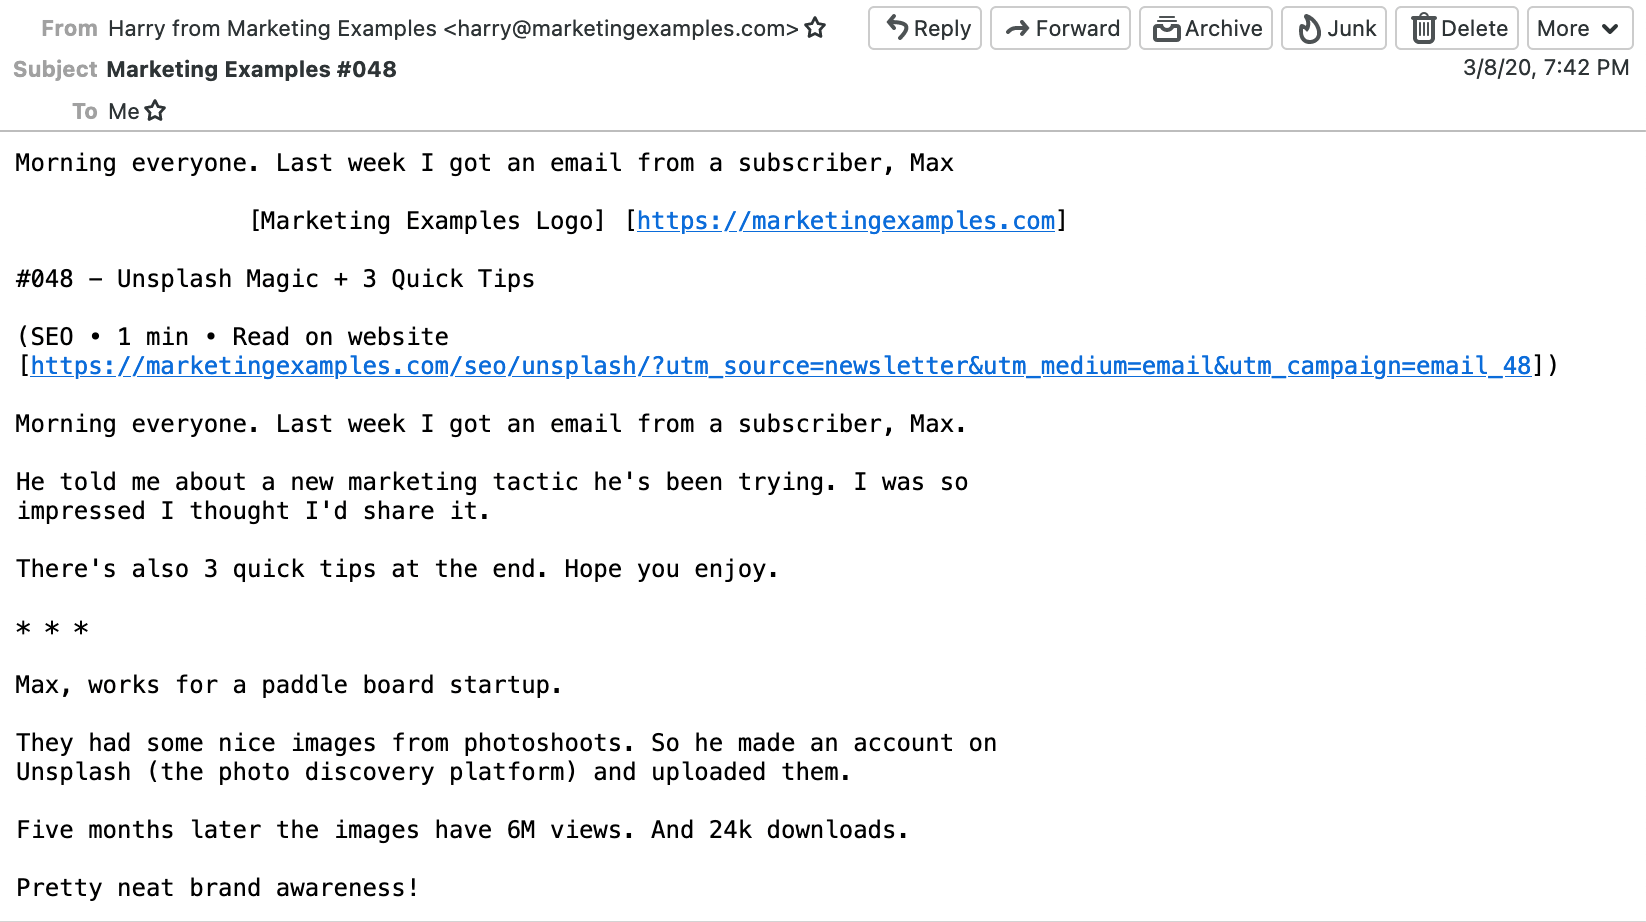
19. Include a plain text version
Make your emails more accessible by including a plain text version. Some people prefer skimming through text emails while others use them together with screen readers. Smartwatches will also fall back to plain text emails for their tiny screens.
Many email service providers automatically send a plain text email alongside your campaign. See an example of how a plain text email looks in the inbox in the image below.
20. Check your design displays well in dark mode
Dark mode themes are popular for users who work in dim light conditions or prefer less glare.
But if you’ve designed your email with a light background in mind, some elements may not display as clearly as you’d hoped. Additionally, if you use a transparent background in your email, the email client will sometimes make your email darker which can cause visibility problems.
Be sure to check how email elements like text, graphics and social media icons are displayed when opened in apps with dark mode enabled. The image below shows an email opened in dark mode.
21. Ensure your emails look great on all displays
Your email should be readable on both desktops and mobile devices. Scrolling on your mobile to read an email formatted for a desktop screen is painful! Email templates from ESPs like MailerLite are designed with this best practice in mind.
22. Schedule emails when people are likely to open them
It’s always tempting to send your email as soon as you finish creating it. But it’s beneficial to hold back and schedule your email for the time it’s most likely to be opened.
If you’re likely to be busy during this prime opening time, you can always schedule your emails in advance. Some ESPs will even consider the time zone of the recipient when sending emails.
23. Enable resend to non-openers for important campaigns
Resend to non-opens is a feature offered by some email marketing platforms that automatically resends your campaign to people who didn’t open it the first time around. This is a good way to increase the visibility of your message without having to create an entirely new email.
We recommend limiting your use of this feature to your most important campaigns. You risk overwhelming your subscriber’s inbox and generating unsubscribes or worse, spam complaints if you use it too often.
24. Send test emails as a final check
Most email service providers will let you preview your email before sending it. However, those previews are never 100% accurate due to differences in the ways inboxes display emails. With this in mind, you should send a test email to your own address to check that everything works as expected.
If it’s your first time sending a message with a new template, try opening the email in different email apps and on various size displays.
Regulatory compliance checklist
These final 3 tips are the steps you need to take to comply with the major global privacy regulations. These steps are easy to implement and your email service provider will usually help make your emails compliant.
25. Add an unsubscribe button
Including an unsubscribe button is an essential part of complying with the CAN-SPAM act and GDPR. Most email templates come with one as standard, but if you’ve coded your own design, you should add one. Unsubscribe links are usually located in the email footer.
26. Check CAN-SPAM requirements
As well as an unsubscribe button, CAN-SPAM requires you to add a valid physical postal address to your email.
You must also:
Avoid using false header information, such as in the “From,” “To,” “Reply-To,” or routing information sections
Avoid using deceptive subject lines
Identify messages as ads when relevant
Honor opt-out requests prompt
You can find out more about all the CAN-SPAM email requirements in the FTC’s official blog post.
27. Check GDPR requirements
The GDPR gives EU residents control over their personal data and how others are allowed to use it.
In particular, data subjects possess rights such as the ability to access, rectify, delete, and obtain a copy of their data. They also have the right to be informed about the processing of their personal data, to restrict its processing, and to be notified of any data breaches.
To allow subscribers to exercise their rights, you should ensure that it’s easy for them to contact you, that you have established procedures to handle such requests, and that you respond to subscribers promptly.
Start sending with confidence
Now you know the tips, run through each of the points and check you are following the recommended best practices before sending your next campaign. If there’s anything on this email checklist that you haven’t yet acted on, take steps to solve the issue.
While the list may feel like a lot, you don’t need to take all the steps every time you send a campaign. For example, once you’ve created your footer and set up your sender details you can reuse this on every campaign.
And once you start following these steps, it won't be long before you start seeing improvements in your email marketing campaigns.