Guide to email sender authentication: Bulletproof your email
 Amy Elliott

Just as locks protect physical premises, email authentication safeguards your email communications. With Google, Microsoft, and Yahoo's strict authentication requirements now in place, understanding these protocols is essential for successful email delivery.
The three core protocols, SPF, DKIM, and DMARC, protect your brand, help prevent phishing and spoofing, and signal to mailboxes that your messages are legitimate and safe for subscribers’ inboxes.
Plus, you can add BIMI to display your brand logo in subscribers’ inboxes for extra security and recognition.
Here, you’ll learn what email authentication is, why you need it, how to do it, and the four email authentication types and what they do. Let’s get to it!
What is email sender authentication?
Email sender authentication is the process performed by mail servers to establish that an incoming email is legitimate and not fraudulent. It’s like doing an ID check; does the sender’s identity match the records associated with the server it’s sent from?
Specifically, email authentication refers to the technical standards that are used to perform the authentication. There are four standardized protocols used by email clients, such as Google, Yahoo, Outlook, and Apple Mail, to verify the identity of senders.
Required authentication for all senders:
SPF (Sender Policy Framework)
DKIM (DomainKeys Identified Mail)
Required authentication for bulk senders (those who send over 5,000 daily emails) and optional for others:
DMARC (Domain-based Message Authentication, Reporting & Conformance)
Optional for all senders:
BIMI (Brand Indicators for Message Identification)
As an email sender, you need to configure these records in your domain’s DNS (Domain Name System) settings. This is especially important now, as Google, Yahoo, and Microsoft implemented strict new requirements for bulk senders.
Proper SPF, DKIM and DMARC authentication
Spam complaints under 0.3%
Include one-click unsubscribe options
Authentication for all subdomains
Alignment between your SPF/DKIM records and visible ‘From’ domain]
Email authentication types and what they do
SPF, DKIM, DMARC and BIMI are the four protocols that support SMTP to ensure bulletproof verification. Let’s take a look at what each of these does.
1. SPF protocol
SPF records define which IP addresses are allowed to send emails for a specific domain. For example, MailerCheck’s SPF record states that sending IP addresses can send emails from the mailercheck.com domain.
The SPF record should be published as a TXT record to DNS so that email servers can reference it for authentication. Most email service providers (ESPs) will provide you with an SPF record when you set up an account to use their services.
2. DKIM protocol
DKIM is SPF’s slightly more secure cousin. This protocol complements SPF by adding an encrypted digital signature to your emails to verify that the message is legitimate.
It provides a private encrypted key to encode email headers. The private key is needed to send messages from the domain, while the receiving mail server accesses the message header contents using the DKIM key published on the DNS, which is a public key.
Just like with SPF, the DKIM key is provided by your ESP, and should be added to your DNS as a TXT record. Unlike SPF, you’ll need a unique DKIM key for each domain.
Once this is done and you have DKIM verified, every time you send an email, a unique DKIM signature will be generated and added to it. The receiving mail server then decrypts the signature using the DKIM key published in your DNS records.
Once decrypted, a hash string is generated based on the contents of the email, and compared to the hash string in the contents of the signature. If they’re a match, the email will pass the DKIM authentication process. This is why DKIM makes it impossible to interfere with emails in transit.
3. DMARC protocol
As of February 2024, DMARC is now required for bulk senders (those sending over 5,000 emails daily) alongside SPF and DKIM. Even if you send fewer emails, DMARC is highly recommended to protect your domain from phishing scams and spoofing attacks.
DMARC binds DKIM and SPF together to offer more flexibility and control over authentication. It provides a framework for feedback so that senders can define how they would like emails to be handled if they fail the DKIM or SPF check. What’s more, it enables senders to track fraudulent activity with reports.
A DMARC record will validate the email’s origin by checking the sender’s IP address and protect the domain from spoofing by aligning the SPF and DKIM records. If one of these checks fails, the DMARC record will instruct the receiving mail server what to do.
Once again, DMARC should be added to your DNS as a TXT record, but this time, it’s a little trickier to configure.
v: Identifies the record and must be listed at the beginning. The value is always DMARC1
p: Identifies the policy chosen for your record, which is applied by mailbox providers if your email fails DMARC authentication. There are three policies to choose from:
p=none: This directs mail servers to take no action but allows you to track emails being sent (minimum requirement for bulk senders)
p=quarantine: This directs mailer servers to send the email to the spam folder if it fails DMARC authentication, and tracks emails being sent
p=reject: This directs mail servers to reject emails that fail DMARC checks, resulting in a bounce. It also allows the sender to track emails being sent
Here’s an example of a basic DMARC record:
v=DMARC1; p=none; rua=mailto:[email protected]
Note: rua=mailto:[email protected] is an optional tag indicating the email address to which complete reports should be sent.
For bulk senders, at minimum, you must set DMARC to “p=none” to meet the new requirements.
4. BIMI protocol
This email authentication type is optional and adds an extra layer of authentication for your business. It adds your brand logo to your domain to be displayed alongside your email in subscribers’ inboxes, just like in this example from MailerLite.
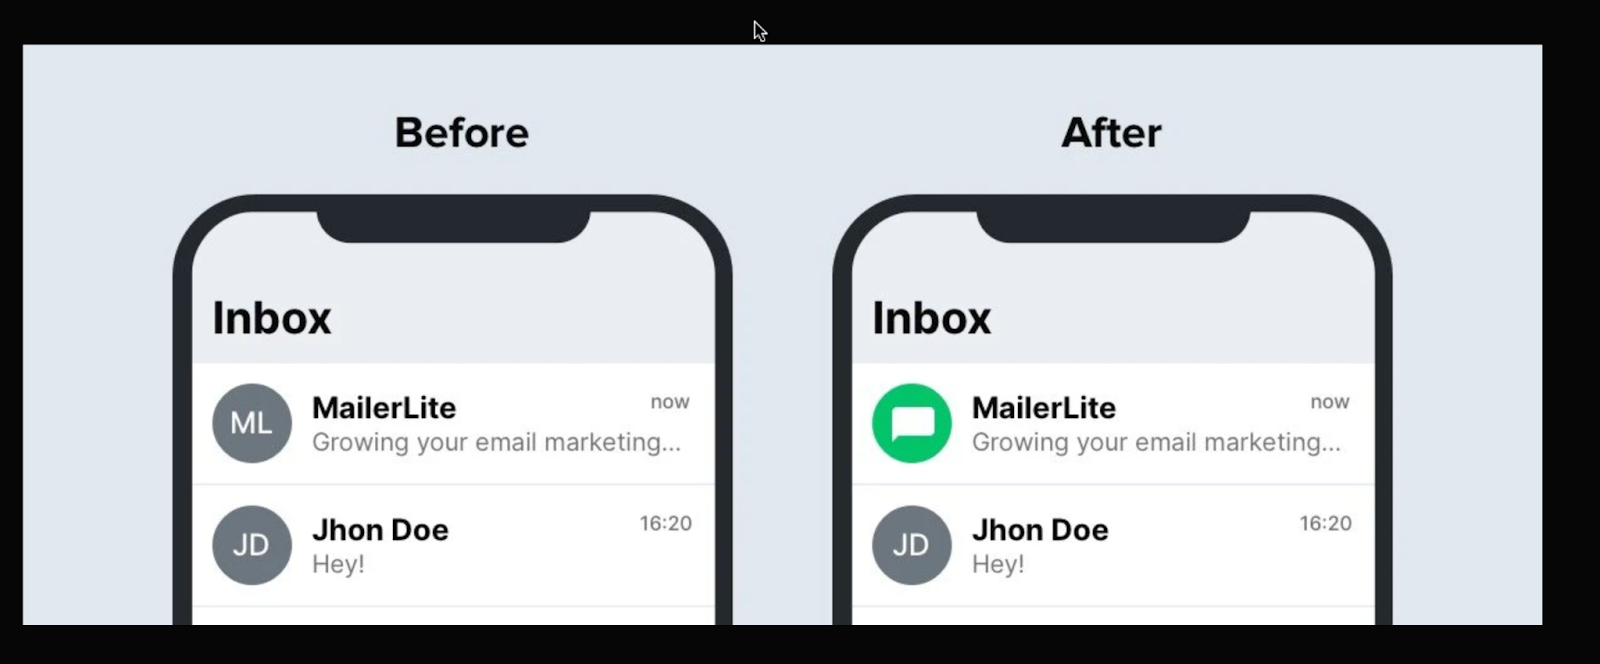
Beyond making your emails stand out, BIMI acts as a visual trust indicator that helps boost subscriber confidence and engagement. It also creates an additional barrier against fraud; if subscribers are used to seeing your logo, they’re more likely to spot suspicious emails that lack it. Remember, that BIMI is only displayed if the other three authentication protocols are passed.
You’ll need to add a specific TXT record to your DNS, which looks something like this:
Name: default._bimi.[Your Domain] In TXT record: "v=BIMI1; l=[Your SVG's URL]; a=[Your Certificate URL]"
Properly configured SPF, DKIM, and DMARC (with DMARC policy set to either “quarantine” or “reject”)
An SVG image of your logo that meets the standard of tiny-PS
Either a Verified Mark Certificate (VMC) or a Common Mark Certificate (CMC)
Check this guide out for more detailed instructions.
For Apple Mail users, there’s an alternative route through Apple’s Business Connect Initiative. Launched in October 2024, Apple Branded Mail lets businesses display their logos in Apple Mail and Phone apps completely free of charge. While not technically BIMI, it achieves similar results for Apple users.
Currently, BIMI is supported by major email clients, including Google, Yahoo, AOL, and Fastmail.
If you’re specifically targeting Apple Mail users, you’ll want to avoid Entrust VMCs, as Apple stopped accepting them in November 2024. If you have Entrusts’s certificates that were issued on or before November 15, 2024, those are still valid until they naturally expire.
5. Reverse DNS and PTR records
While not strictly an authentication method, Reverse DNS (rDNS) lookup and PTR (Pointer) records play a crucial role in email deliverability and spam prevention. Think of it as a two-way street of verification. While regular DNS translates domain names to IP addresses, reverse DNS does the opposite.
This is how it works: When your email server sends a message, the receiving server performs a reverse DNS lookup on your sending IP address. This lookup should match a corresponding PTR record that points back to your domain name. It’s like having your home address verify your ID, and your ID verify your home address.
For example:
Forward DNS: yourdomain.com → 192.0.2.1
Reverse DNS: 192.0.2.1 → mail.yourdomain.com
Many major email providers, including Gmail and Microsoft, require valid reverse DNS records before accepting emails.
Your email messages may be blocked or marked as spam
Your sender reputation could suffer
Some receiving servers might reject your messages entirely
A valid PTR record signals legitimacy; spammers rarely bother with proper reverse DNS configuration. Think of it as another layer of credibility for your sending infrastructure.
How email authentication works
When set up correctly, the email sending and receiving process is almost instantaneous, but you’d be surprised at what goes on behind the scenes!
Every time a mail server receives an email, it verifies the sender’s authenticity. If one of the checks fails, it acts based on the policies set out by the sender in the DMARC record. This could result in the email being flagged or bounced.
This process can vary slightly in its approach, but generally it looks like this:
-
1
The sender implements the protocols needed to authenticate emails sent from its domain. These are configured on the mail server and the sending domain’s DNS (Domain Name System) zone file.
-
2
When an email is sent, the receiving mail server looks for specific identifiers in the email and DNS records to confirm the sender’s identity and make sure that the email is safe to deliver.
-
3
The receiving mail server checks the records. If email authentication is verified, the email is happily forwarded to the mailbox of the receiver. If not, it will follow the policy rules set out by the sender, which could land the email in spam or result in a bounce.
How to authenticate email in MailerLite
With most ESPs, email sender authentication should be a similar, straightforward process. We will show you just how easy it is using MailerLite, our email marketing sister!
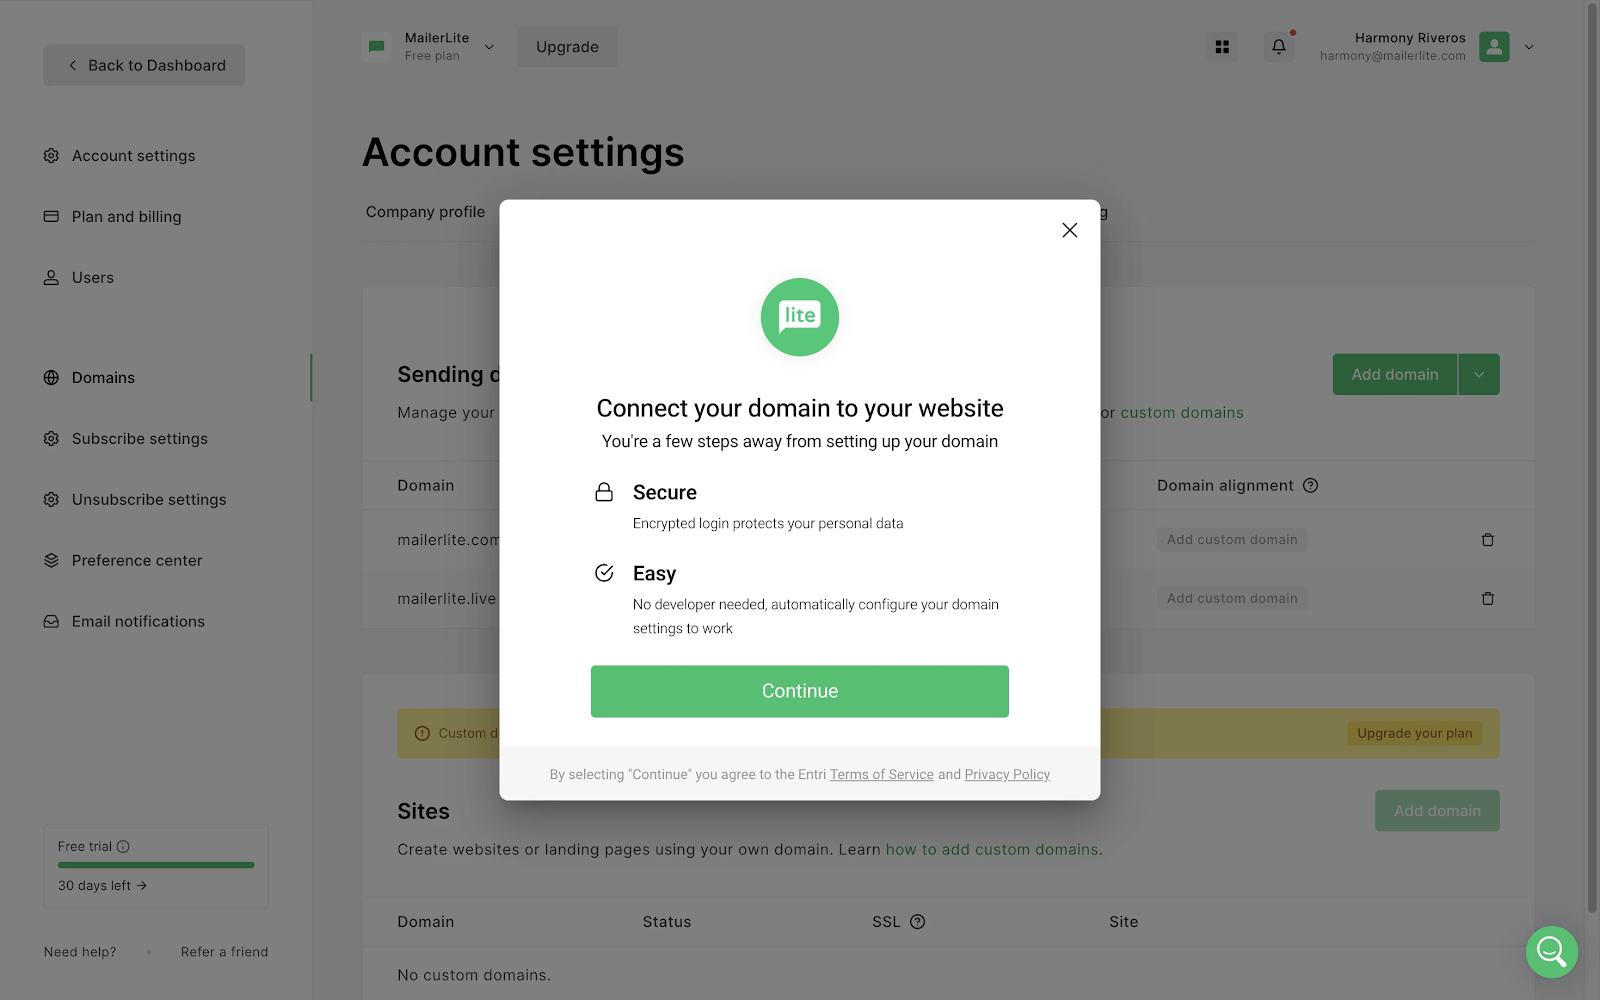
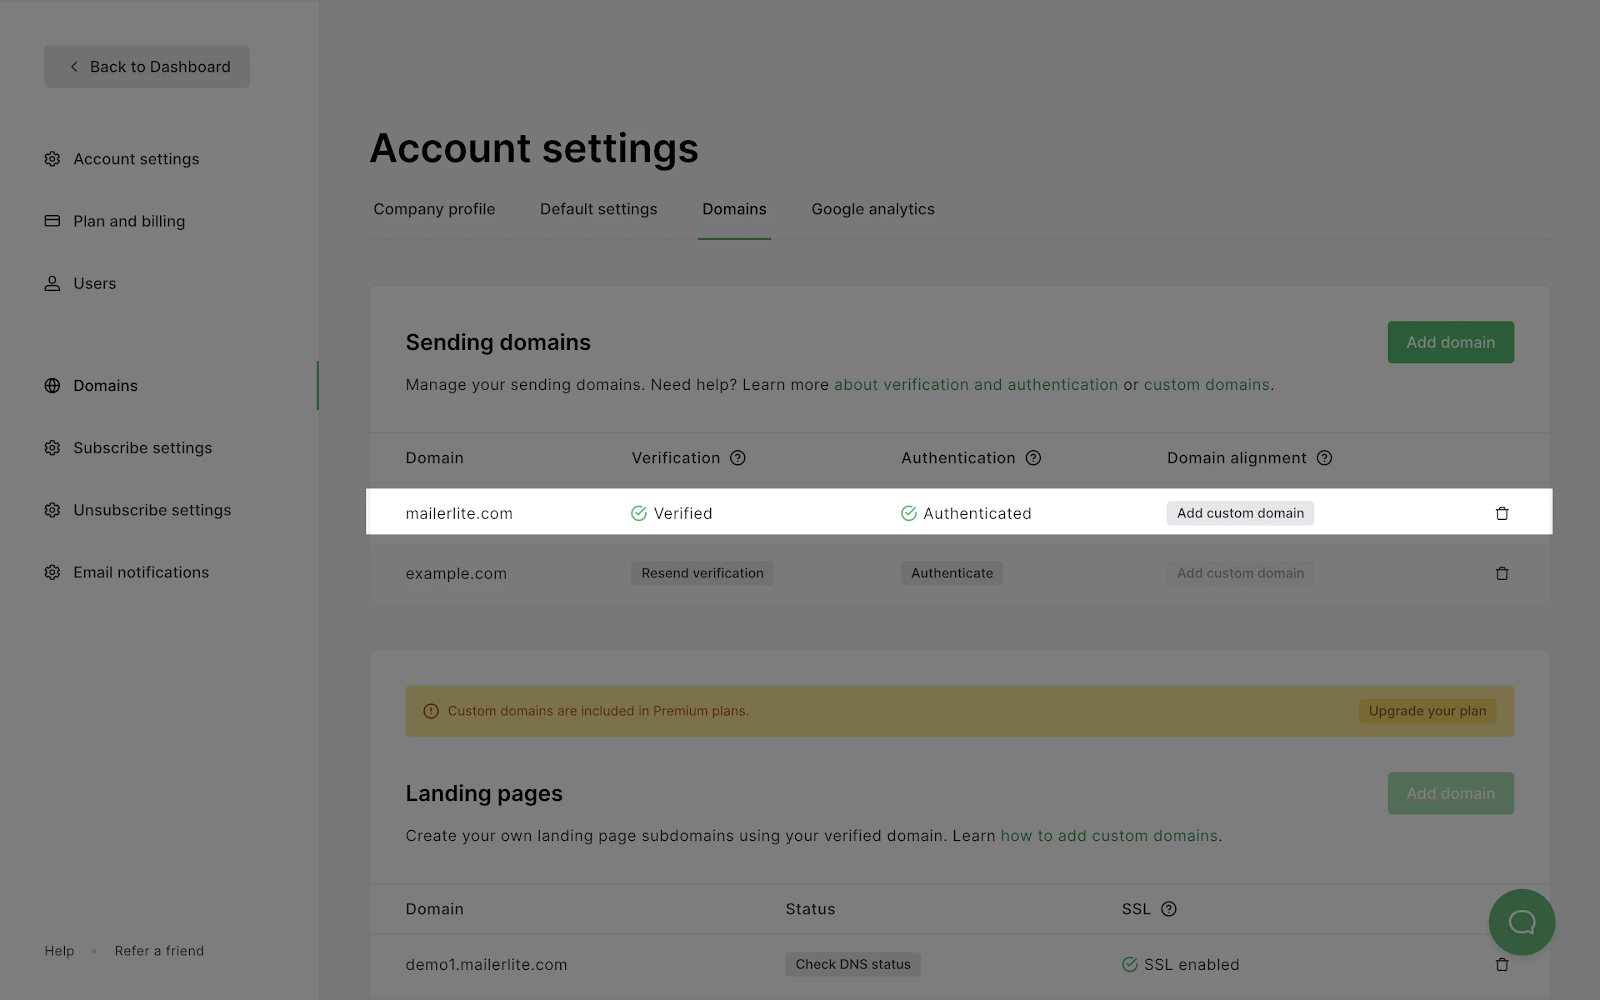
Log in to MailerLite, navigate to Account settings, and select the Domains tab.
Click Add domain and enter the email address you’ll use for sending. Click Save.
Next, click Authenticate. If your DNS provider is one of MailerLite’s partners, you can use our automatic setup feature for authentication.
4 . The system will scan and detect your hosting provider. If successful, simply follow the on-screen instructions to connect your domain.
5. If automatic detection isn’t available, you’ll receive the Name and Value fields for both DKIM and SPF records. Keep this window open.

6. Access your domain’s DNS records (contact your hosting provider if you need help).
7. Add the DKIM as a CNAME record and the SPF as a TXT record, using the exact Names and Values provided by MailerLite.
8. Return to MailerLite and click the Check DNS Records button to check if the DKIM and SPF records match.
If they match, the records will be approved, and your domain will be authenticated.
And that’s it! If your DKIM and SPF records aren’t approved right away, don’t worry. It can take up to 24 hours to update this information.
So, this is how you find your authentication records in MailerLite; your ESP's records should look similar. Once you have your records, you can check this guide on how to add them with different hosting providers.
Need to test and monitor your email authentication? We’ve got you!
With MailerCheck, keeping tabs on email authentication is easy—you never need to worry about possible failed authentication. As well as keeping your email list clean and healthy, MailerCheck’s email insights feature tests your email content and checks the two essential email authentication types before you hit send.
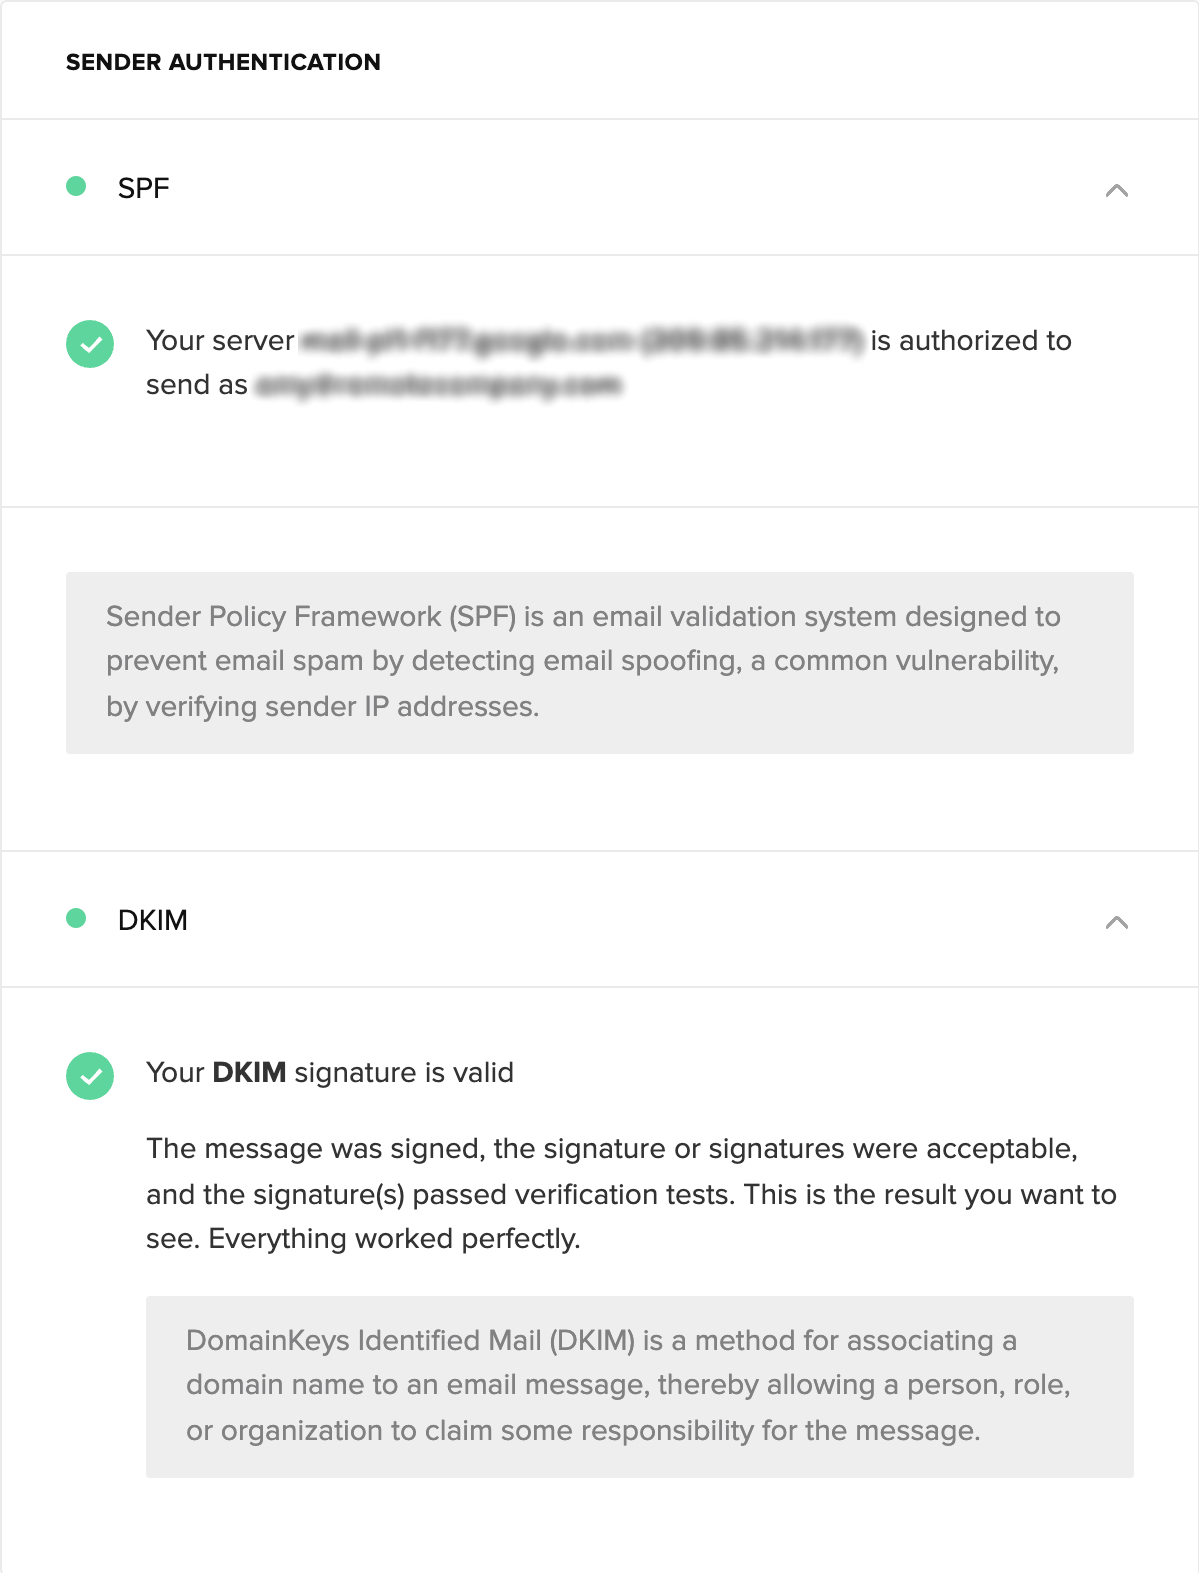
No sender expects their authentication to fail, but it can happen from time to time. For example, when changing DNS providers. MailerCheck enables you to send each and every email campaign with complete confidence, knowing your email authentication is verified.
Additionally, MailerSend's DMARC monitoring and reporting tool provides comprehensive oversight of your email authentication. This powerful feature:
Monitors and analyzes your DMARC authentication results in real-time
Tracks potential domain abuse and maintains compliance
Provides detailed insights into authentication pass/fail rates
Identifies all sources of email using your domain
Alerts you to potential spoofing attempts
Highlights alignment issues between SPF and DKIM
Check your email authentication now!
Sign up to MailerCheck and get 10 free credits.
In addition to regularly running email authentication checks, it’s a good idea to keep an eye on open rates. Often, when mistakes happen or processes fail, a significant drop in opens is the first indicator that something has gone awry.
Benefits of email authentication for businesses
As wonderful as email is, it’s become a major platform for cybercriminals. That’s why proper authentication is crucial for your business. Here’s how you benefit:
1. Prevent spoofing and phishing
Email authentication acts as your first line of defense against cybercriminals who might try to impersonate your brand. With properly configured SPF, DKIM, and DMARC records, you make it virtually impossible for attackers to send fraudulent emails using your domain.
This protects your business and customers from potentially costly phishing attacks and scams that could damage your brand image and customer relationships.
2. Protect your domain reputation
Your sending domain’s reputation is like your business’s credit score in the email world. Authentication protocols help maintain this reputation by making sure only legitimate emails are sent from your domain.
This is especially relevant today when Google, Yahoo, and Microsoft have implemented stricter rules for bulk senders. A strong sender’s domain reputation equals better deliverability and fewer blocked messages.
3. Improve inbox placement and deliverability
Without proper authentication records, ISPs will likely send emails to the spam folder instead of the inbox. That’s why authenticated emails are more likely to reach their destination. Major mailbox providers like Gmail and Yahoo now require proper authentication (SPF, DKIM, and DMARC) for bulk senders.
If you don’t follow these protocols, your emails may automatically be sent to spam or blocked entirely. Also, most ESPs, like MailerLite, require you to have valid records to use their service.
4. Build trust with subscribers
Authentication makes your emails look more professional and trustworthy. When combined with BIMI, your authenticated emails show your brand logo in supported inboxes, which your recipients recognize and trust immediately.
This visual trust indicator can increase open rates and engagement while helping subscribers quickly identify legitimate messages from your business.
What is email spoofing and why should you care?
Email spoofing is when cybercriminals forge email headers to make messages look like they’re from trusted sources, like your bank, favorite retailer, or even your boss. It’s particularly dangerous because most email systems don’t automatically verify sender addresses, making it easy for scammers to slip through.
The dangers are significant:
Financial losses from fraudulent wire transfers
Data breaches from sharing sensitive information
Malware infections from clicking on malicious attachments
Reputation damage if scammers use your email to spam others
Identity theft through stolen personal information
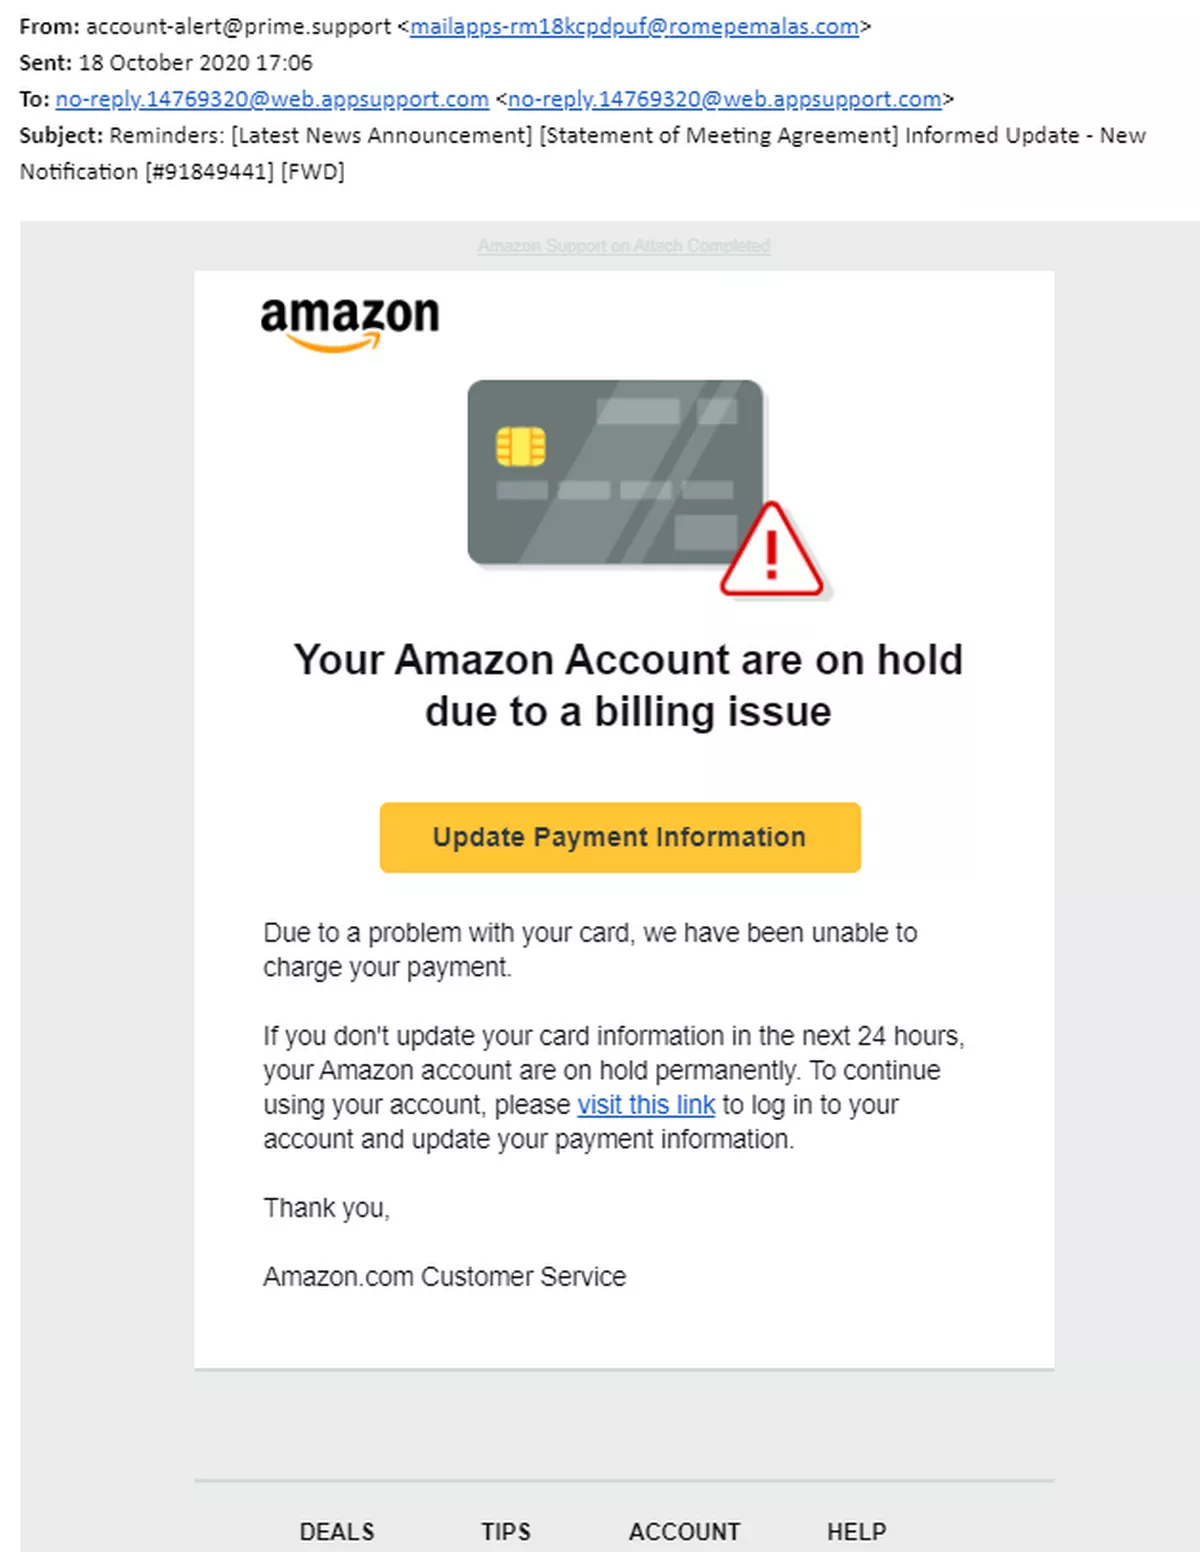
Amazon is one example of a brand that scammers commonly use to send fraudulent emails. Here's a common scenario: A scammer sends an email that perfectly mimics Amazon's branding, claiming there's an issue with your Amazon Prime membership renewal or that your account needs immediate attention. They urge you to click a link or call immediately to resolve the problem, hoping to trick you into sharing your payment details or personal information.
The scariest part? These attacks are getting more sophisticated. In 2023 alone, businesses lost billions to email spoofing and related scams. And it’s not just large corporations at risk; anyone with an email address can be targeted.
This is exactly why proper email authentication is crucial. Implementing protocols like SPF, DKIM and DMARC make it much harder for scammers to impersonate your domain. Think of it as putting a digital lock on your email identity.
Although anyone can be a spoofing target, here are the most common categories:
Individuals: Adults aged 25-44 are prime targets, especially those who shop online frequently
Business executives: C-suite leaders who can approve large payments
Finance and IT teams: Staff with access to sensitive systems and transaction authority
New and remote employees: Those less familiar with company security protocols
Anyone handling financial transactions or sensitive data regularly
Email authentication is essential for any business
If you have a business, you need to authenticate your email. Configuring your SPF and DKIM records are two simple ways that you can protect your brand, avoid email fraud and increase deliverability today.
Combined with the powers of DMARC and BIMI to turbocharge your efforts, you’ll make your emails more trustworthy to mail servers and subscribers alike while keeping those pesky cyber criminals at bay.
Have you tried implementing these two additional email authentication types, DMARC and BIMI? Share your experience in the comments!
FAQ
How often should I check my DNS records?
Check quarterly, after infrastructure changes, or if you notice delivery issues. Regular monitoring helps catch problems early.
What happens if I skip one of the protocols?
Missing authentication protocols can result in email messages landing in spam or being blocked entirely. For bulk senders of over 5,000 subscribers, all three (SPF, DKIM, DMARC) are now mandatory.
How do I know if it’s working?
The easiest way is to use MailerCheck's email insights feature, which automatically verifies your authentication setup before sending. You can also use free online DNS checkers like MXToolbox, monitor delivery rates, or use your ESP’s built-in authentication tools. Sign up for MailerCheck to get 10 free credits and check your authentication status instantly.
Can I set this up without a developer?
Yes! Most ESPs provide simple copy-paste instructions or automatic setup options. Just follow their step-by-step guides.