Your complete guide to email blocklist removal
 Amy Elliott

Your email marketing efforts have been going great. You’ve been sending out creative campaigns, ramping up engagement, and even seeing more conversions. Then, BAM! Out of nowhere, you’ve landed on an email blocklist. 😱
An email blocklist is a collection of email server IPs associated with spam—not where any business wants to find itself. But it can happen to the best of us!
In this article, you’ll learn about the different types of email blocklists, how to check if you’ve been blocklisted, why it happens in the first place, and how you can get your IP removed.
The definition of an email blocklist
Email blocklists are lists of servers, domains and IP addresses that have been flagged for sending spam.
There are many different blocklists, each of which has varying impacts on email delivery for those that land on them. Some of the more reputable and well-known blocklists are Spamhaus, Barracuda and SpamCop.
Different IP blocklists are used by spam filters, Internet Service Providers (ISPs) like Gmail, Yahoo and Microsoft Outlook, and mailbox administrators to detect spam for their users.
There are two types of email blocklists:
Internal email domain blocklists are usually owned by mailbox providers, for example, Google. A company mailbox administrator could also set up their own internal blocklist. In this case, the owner of a blocklisted IP would contact the mailbox provider or administrator, as they are the owner of the blocklist.
External email domain blocklists, which we will focus on in this article, are owned and managed by a third party. Mailbox providers can use these blocklists to filter out incoming spam. If your IP has made its way to an external blocklist, you would need to contact the third party.
How to check if your email is blocklisted
One of the first signs that your email has been blocklisted is lower open rates and a sudden increase in bounces.
If you’re using an Email Service Provider (ESP) you’ll need to investigate this with them. If not, the bounce message you receive will relay some information about the reason your email bounced.
For example: “Reason: Sender IP (000.00.00.000) is blocklisted at zen.spamhaus.org.”
Do a manual blocklist check
When you’re noticing increased bounces, suspect that you may have been blocklisted, or just want to practice good email maintenance—you could always manually check each email blocklist. MultiRBL, Barracuda, Spamcop and Spamhaus are just a few of the very many that you can check. However, this is very time-consuming!
Use an email blocklist checker
Alternatively, you can use an email blocklist checker tool like Email Insights. These tools can automatically identify any IP blocklists you’re on. MailerCheck also includes other services, like email list verification. Cleaning your email list regularly helps to keep it healthy and prevents deliverability issues from happening in the first place!
Blocklist monitoring: Be alerted in real-time
Blocklist monitoring tools alert you if any of your IPs or domains are added to a blocklist. This is the best solution for maintaining a healthy sender reputation and maximum deliverability, as it notifies you in real time and allows you to take steps to resolve the issue immediately.
Blocklist monitoring tools automatically check and notify you, meaning there’s no need for manual checks. MailerSend’s blocklist monitor provides details about the blocklist as well as instructions on how to get delisted. What’s more, it runs checks as often as every 2 hours, so you can rest assured that your IPs and domains are safe.
How to get removed from an email blocklist
There’s no need to panic! If you’re a legitimate sender, there are steps you can take to get your email removed from the blocklist, and prevent it from happening again. Here’s how.
If you’re sending via an ESP or SMTP relay service
ESPs, like MailerLite, and SMTP relay services use a pool of IP addresses which they send emails from. These are known as shared IPs, and they are used by multiple senders.
Occasionally, the actions of one person have a negative effect on the overall sender reputation, which in turn affects everyone else's deliverability and lands the IP on a blocklist. This rarely happens, as most providers meticulously manage their IP addresses and moderate their user's sending behavior.
If it does happen, however, it’s on the provider to correct the issue and have the IP removed from the blocklist. In this case, your first port of call is to contact your provider, and they should be able to resolve the situation.
If you’re sending via your own SMTP server
There’s work to do but if you follow these steps, you should be able to get your IP removed from the block list.
1. Identify the problem and fix it
You can run a check using an IP blocklist checker tool, or head to the blocklist website to find your IP address. These will provide you with the reason(s) that your IP address was blocklisted. Next it’s time to fix the issues:
Hacked accounts: Regain control of the account, change passwords and put additional security measures in place to protect the server from malware or bots. Clean up any mess created by the hacker.
Spam traps: Run your email list through an email verification tool to identify spam traps (and other potentially damaging emails) and remove them from your list. Take steps to maintain your email list health and avoid spam traps.
Spam complaints: Remove any subscribers who have not opted-in to your marketing emails, and create an opt-in email campaign to confirm those who would like to stick around. Review your newsletter content to re-evaluate whether you’re still providing the type of content you promised to.
Email spoofing: Having standard email authentication protocols in place can help protect your business from outbound spoofing attacks (attacks on your customers). Make sure you have properly configured SPF, DKIM and DMARC records.
Sending too many emails: First, scale back your sendings and then start to warm up your IP reputation gradually. If your email list has grown quickly (and legally), then spread out your sendings, instead of emailing everyone right from the get-go.
Unhealthy email list: Use an email verification service to identify problematic email addresses and remove them from your list. This isn’t a one-time-only task! To keep your email in tip-top shape, improve deliverability, and stay off blocklists, you should regularly perform checks to maintain good list hygiene.
2. Scan your computer and network for viruses and malware
You should also ensure that all Operating Systems (OS) are up to date and your network is configured as securely as possible.
3. Delist your IP address
If you’re confident that you’ve fixed the issues that got you added to the blocklist, it’s time to start the delisting process. Each blocklist has a different procedure, so you should read their instructions carefully, but they will often allow you to submit a removal request. Generally, there are two methods:
Self-removal: If you’re on a self-removal list—lucky you! You can do just that. Be warned though that if you are not found to have sufficiently fixed the issues, you’ll be re-added and it will be trickier to remove yourself the next time.
Automatic removal: This is time-based and relies on the seriousness of your offense. Lower-level issues will be automatically removed within a couple of weeks, while more serious issues, such as large numbers of spam emails sent, will take longer. If you’ve fixed the issue, it’s just a matter of waiting to be removed.
How to get unlisted from Barracuda, Spamcop and Spamhaus
If any of these three blocklists ring a bell, that’s because Barracuda, Spamcop and Spamhaus are three of the biggest IP blocklists in use. Here’s how to get delisted from them.
Barracuda
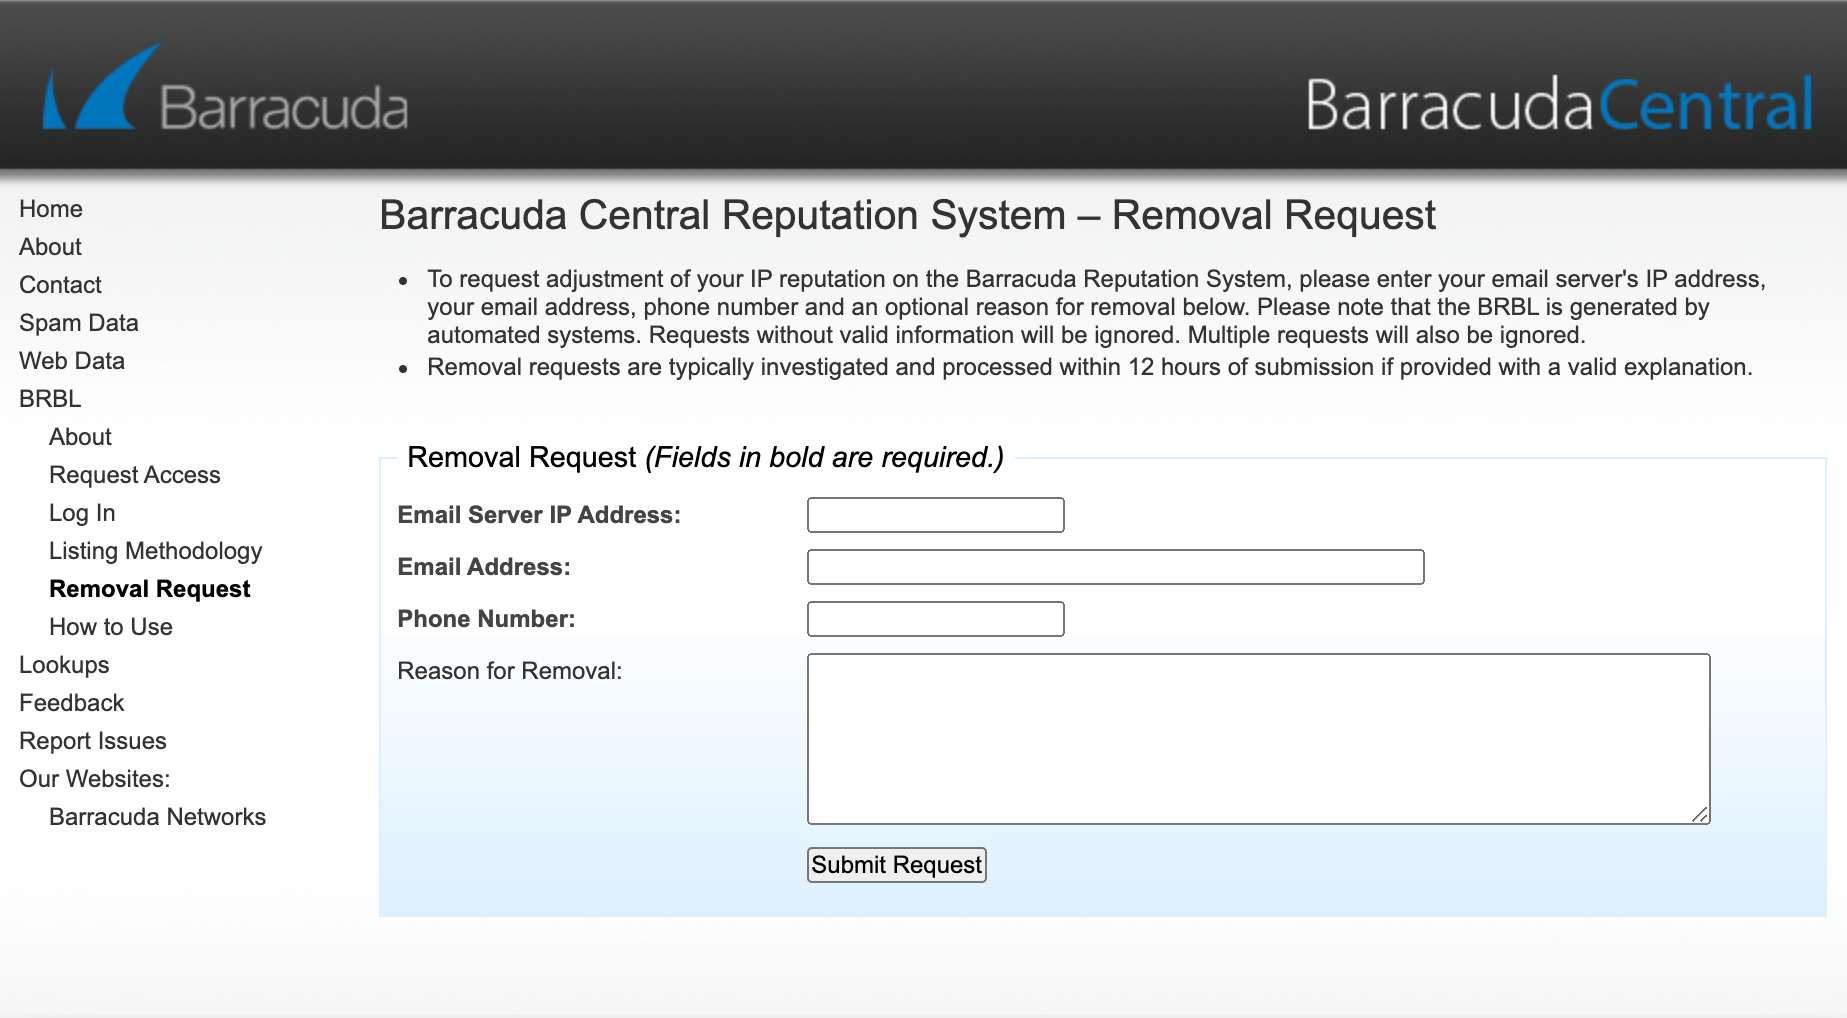
Barracuda allows you to request the removal of your IP address. Once you’ve fixed the issues, fill in the removal request form on Barracuda’s website. Note that multiple requests will not see your IP be delisted faster—in fact, they will be ignored. Submit one request and be patient!
Spamcop
Spamcop doesn’t provide the option to submit a removal request. But that’s OK, because if you fix the problems that had your IP flagged, Spamcop will automatically remove you from their email domain blocklist in as little as 24 hours.
Spamhaus
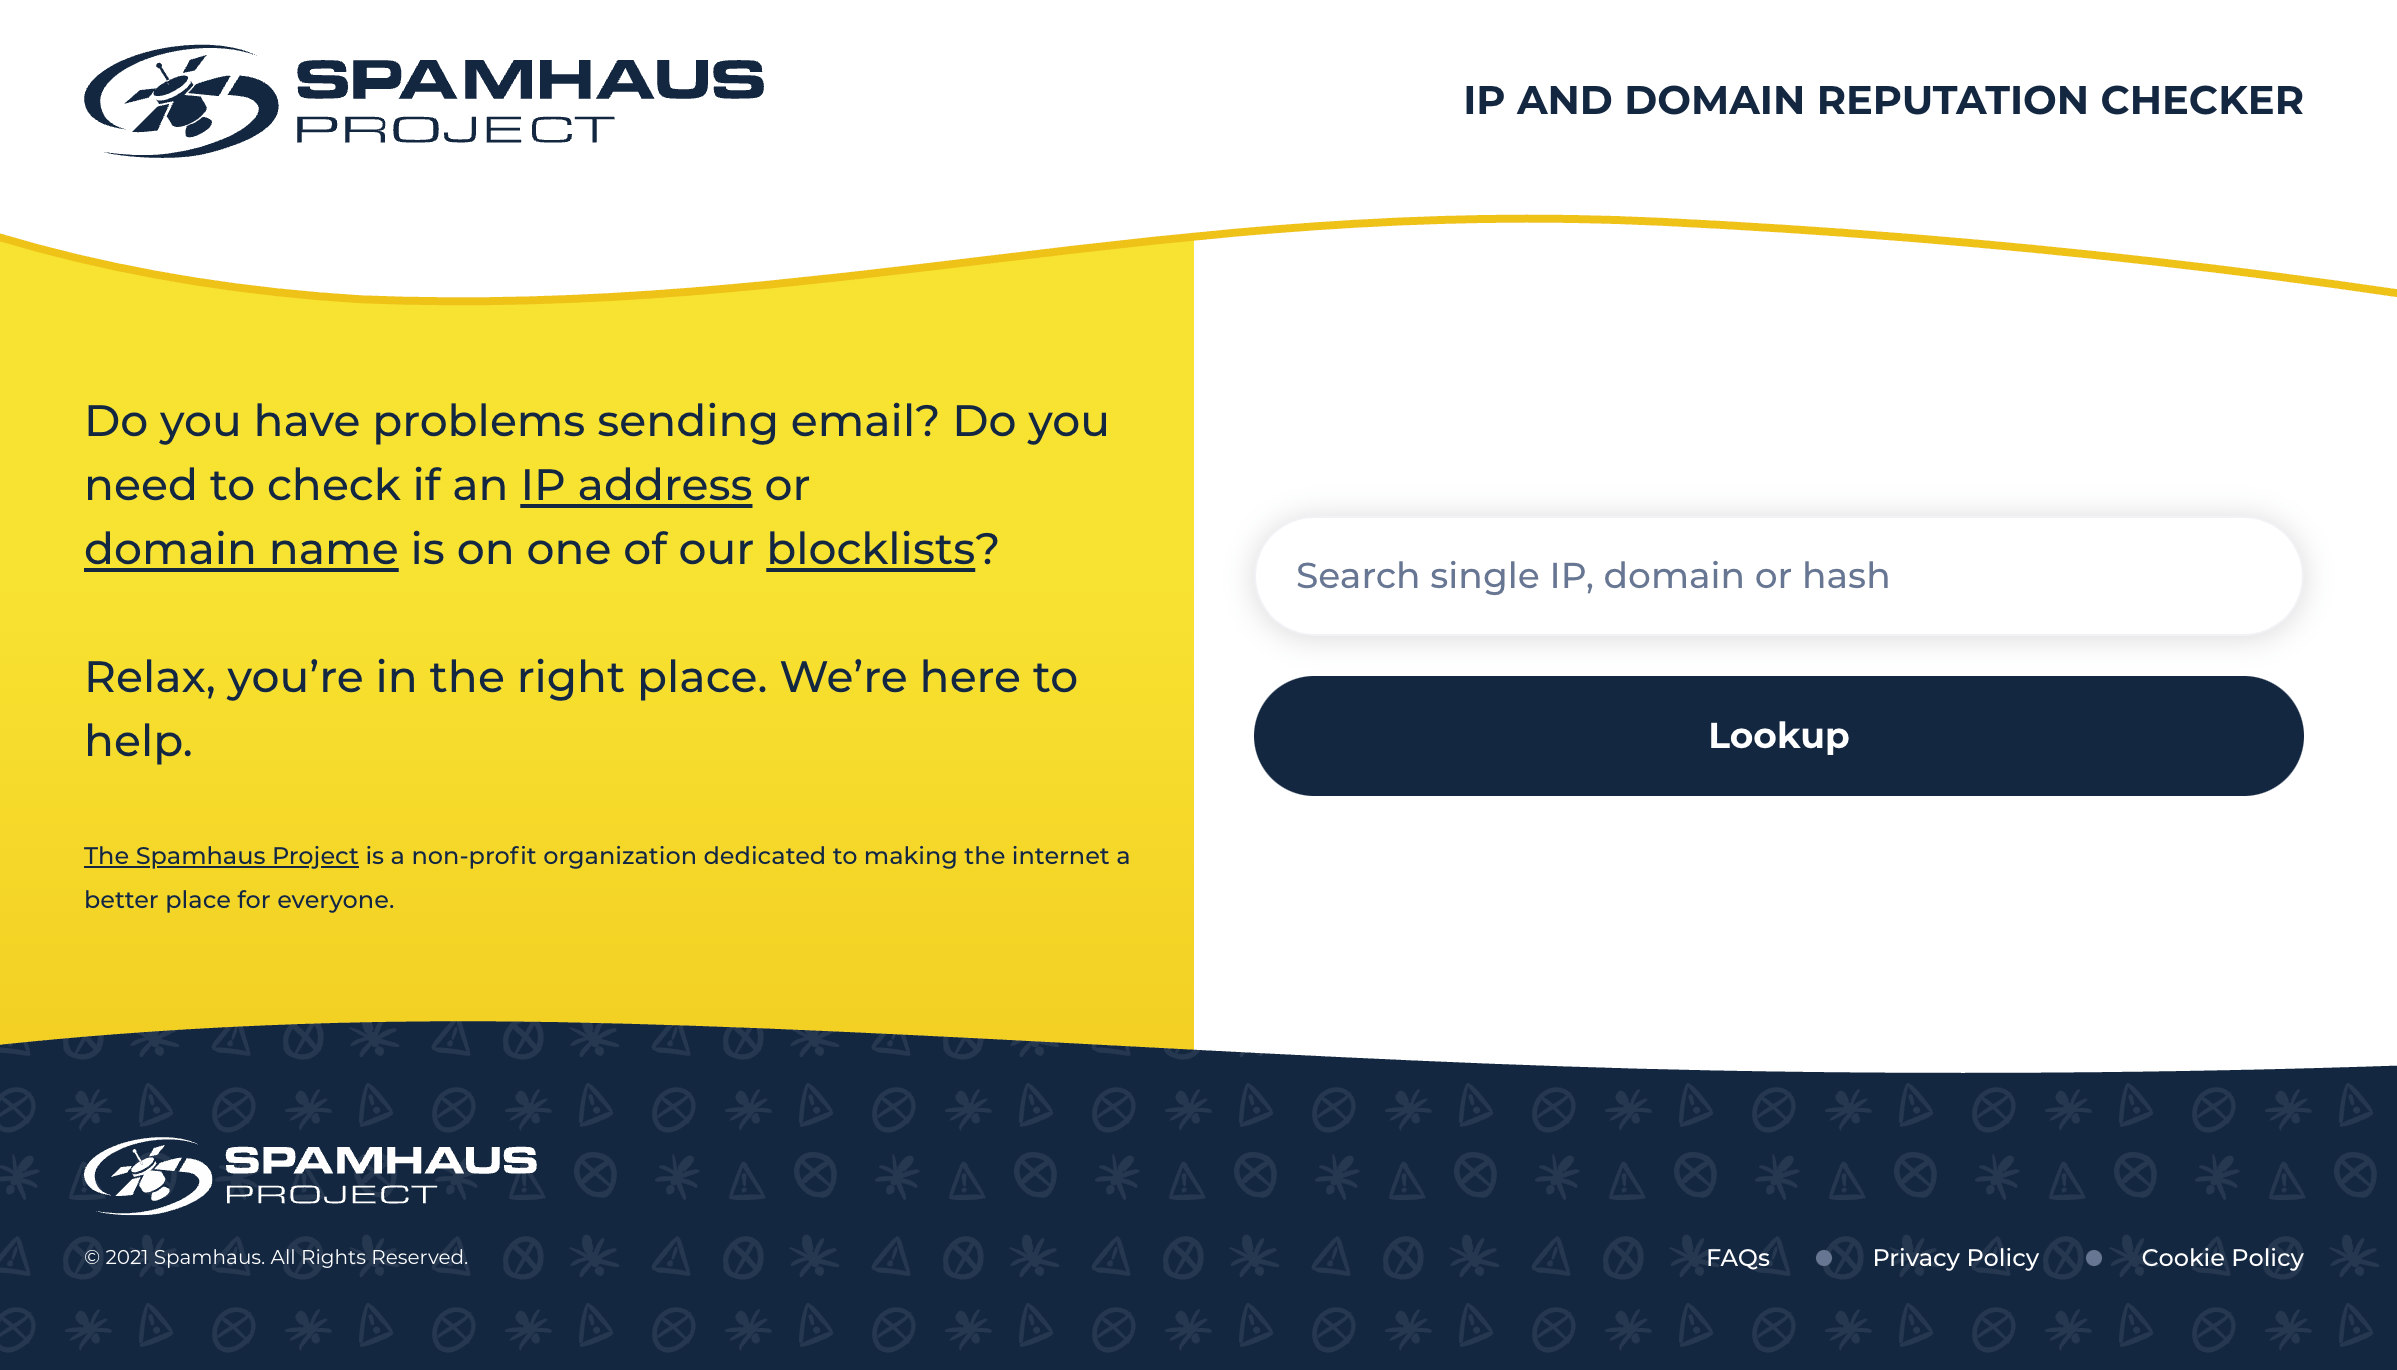
To start the delisting process with Spamhaus, you need to first go to their lookup page. Submit your IP, domain name or hash, and then follow the instructions on how to delist.
You should always provide additional information to support your case where possible. Be open and honest about your situation, and you’ll more likely be granted the removal!
How to get delisted from other blocklists
If you use MailerSend’s blocklist monitoring tool, it’s super easy to start delisting your IP or domain. Your blocklist alert will include instructions on how to delist, with tips on how to make the process easy and pain-free. What’s more, MailerSend’s blocklisting reports include buttons that go directly to the delisting page of the blocklist, so your request will take only minutes to submit.
Why IP addresses get blocked in the first place
Email blocklisting is designed to protect people from spam. There are various reasons an IP, server or domain name can end up there. Even perfectly legitimate email marketers can find themselves blocklisted.
Here are the different types of listings and their criteria.
Evidence-based listings
These types of listings are the result of hard evidence that points to the IP being involved in sending spam emails.
This includes:
Hacked accounts sending large amounts of spam emails
Spam traps
A high number of spam complaints
Email spoofing, which involves the sender pretending to be a person or business they are not affiliated with
Suspicious sending activity, such as suddenly sending a very large amount of emails
An unhealthy or “dirty” email list
Technical listings
This type of listing happens because of technical mail server configuration issues. It's a simple mistake, but luckily, also usually easy to rectify. This could be down to incorrect PTR and reverse DNS records, missing DMARC, SPF or DKIM records, or incorrect banner greetings.
Policy listings
Policy listings occur when the sending IP address belongs to a certain range that is known to break email sending policies. For example, the IP address range has a history of sending substantial amounts of spam emails or frequently fails to properly handle unsubscribe requests. It also includes IP address ranges belonging to end-user devices that should not be sending emails. This helps to protect recipients from potentially infected devices on the network.
How to prevent being blocklisted
Even if you haven’t been blocklisted, as an email marketer, it’s important to ensure you’re constantly doing everything in your power to prevent it.
1. Never purchase email lists
Aside from the fact that buying email lists is illegal, they’re extremely bad for business. The people on these lists never consented to be contacted by you. There’s a good chance they’re not interested in your emails, which is sure to result in increased spam complaints. What’s more, these email addresses are unverified and could be full of spam traps, inactive emails and more—which will wreak havoc on your deliverability.
2. Use an email verification service
Running your email list through a verification tool will identify problematic email addresses so that you can remove them from your list. You’ll avoid spam traps and increase deliverability.
3. Keep your email content spam-free
Even with the best intentions, technical mistakes in emails as well as spam-like content and subject lines (including certain words like “buy now” and “free”), can result in your email being filtered into the spam folder.
4. Stick to using full URLs
URL shorteners are often used by spammers to conceal suspicious links. Use the full URL so the recipient can see what the destination of the link is.
5. Only link to reputable websites
As a legitimate business, you should be doing this anyway, as you’ll have no reason to be sending out dodgy links to subscribers! But linking to disreputable websites has a negative effect on your email reputation, so be cognizant of the links you share.
6. Use active/double opt-in confirmation
Make your signup forms clear, and ensure that opt-in consent is active—as in, the subscriber needs to perform an action to opt-in, not to opt-out. Even better, implement double opt-in confirmation so you rest assured that subscribers really want to hear from you. This will also help you to avoid faulty, typoed email addresses.
7. Make it easy to unsubscribe
Sure, you don’t want subscribers to leave your mailing list, but would you prefer them to mark you as spam instead? Make your unsubscribe button or link easy to find and keep the unsubscribe process simple.
8. Properly configure your email authentication records
Standard email authentication gives certainty to ISPs that your emails are safe, and it’s fairly easy to set up!
Spam is a big deal
The goal of blocklists is to protect users from spam—it’s not to stop businesses from sending emails. If you work towards maintaining a healthy, clean email list, ensuring your content isn't spammy, and properly configuring email authentication, you should be able to avoid blocklists.
If you do end up on one, however, no sweat, it happens! If it’s because you’ve made a genuine mistake, and not because of questionable practices, you should be able to get delisted in no time. Just remember that IP blocklist removal the second time around is often more tricky—so stick to these best practices to prevent that from happening.
Do you have any tips for avoiding blocklists or email blocklist removal? Let us know in the comments!