GetResponse email verification
Why is MailerCheck the Best Email Validation for GetResponse?
MailerCheck is the leading solution for GetResponse users who want to improve their email deliverability. It seamlessly integrates with GetResponse and offers a complete suite of email deliverability tools, from email validation to sender reputation management.
With MailerCheck, you can:
Validate your email lists to ensure that all of your emails are deliverable, from bulk to single email address or real-time API
Get detailed reports on your email deliverability so you can track your progress and make improvements
How to Use GetResponse Email Verification Integration
To set up the GetResponse email verification integration with MailerCheck, follow these steps:
-
1
Log in to your MailerCheck account.
-
2
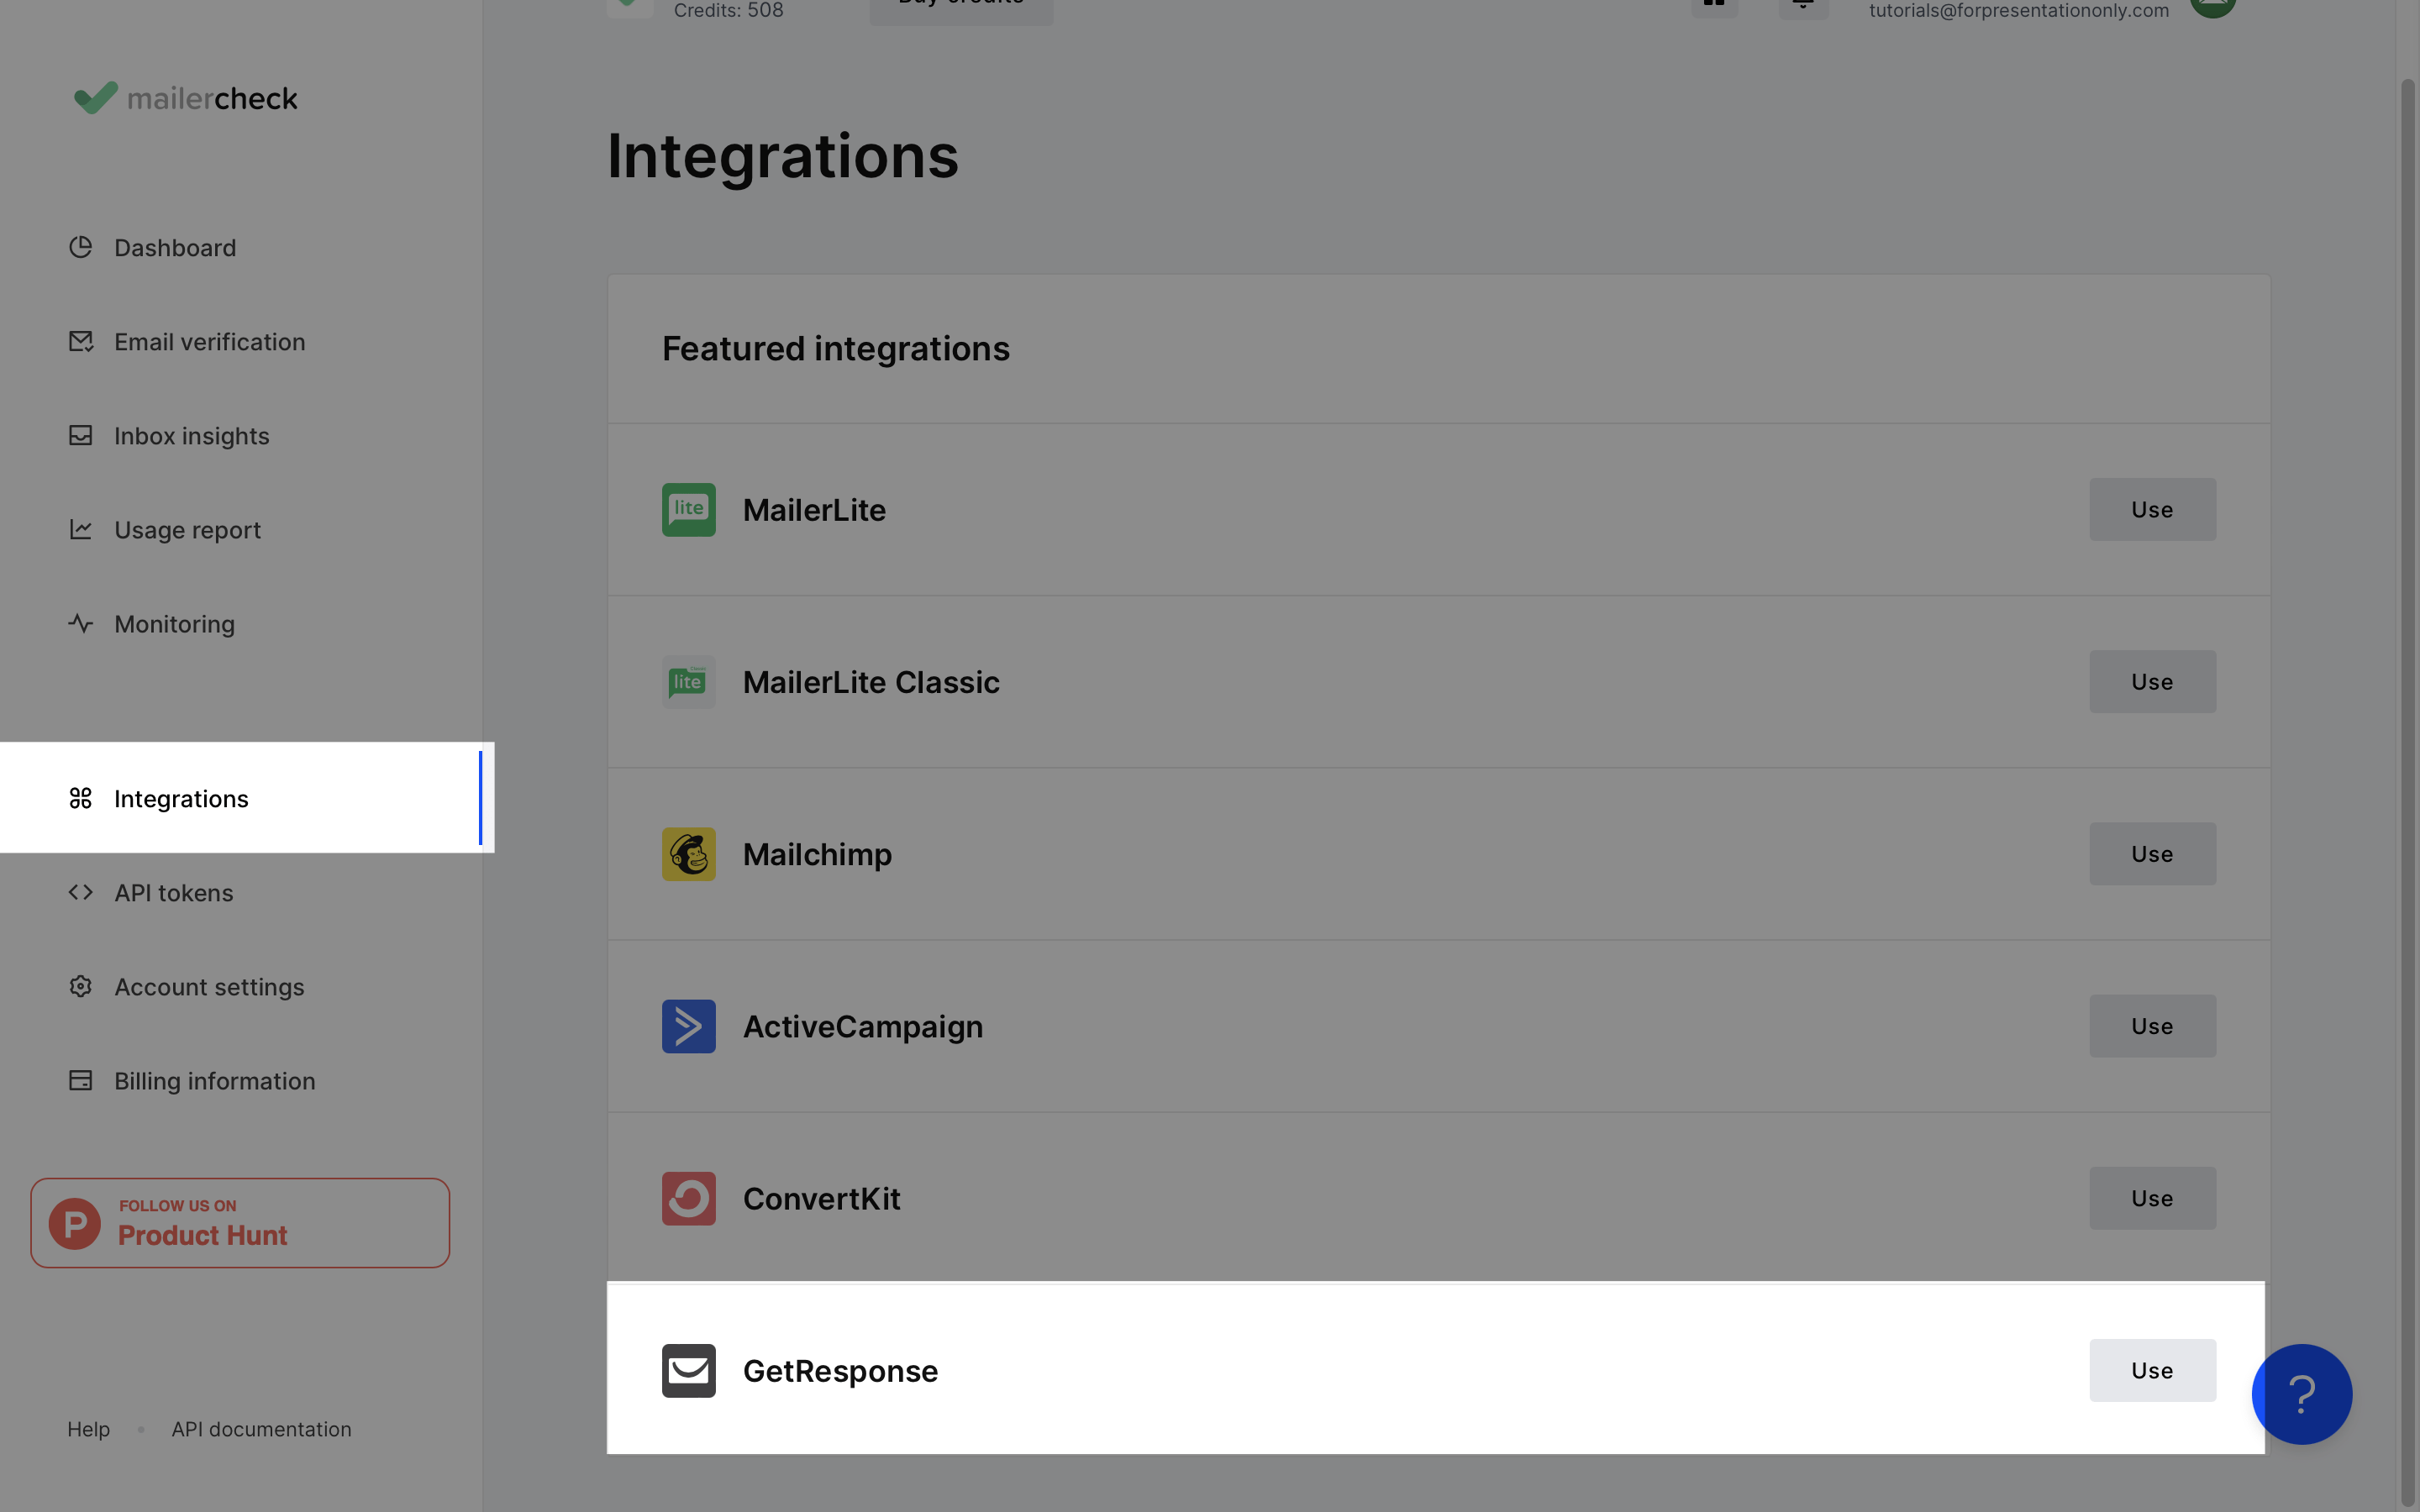
Select Integrations.
-
3
Locate and choose GetResponse by clicking the Use button.
-
4
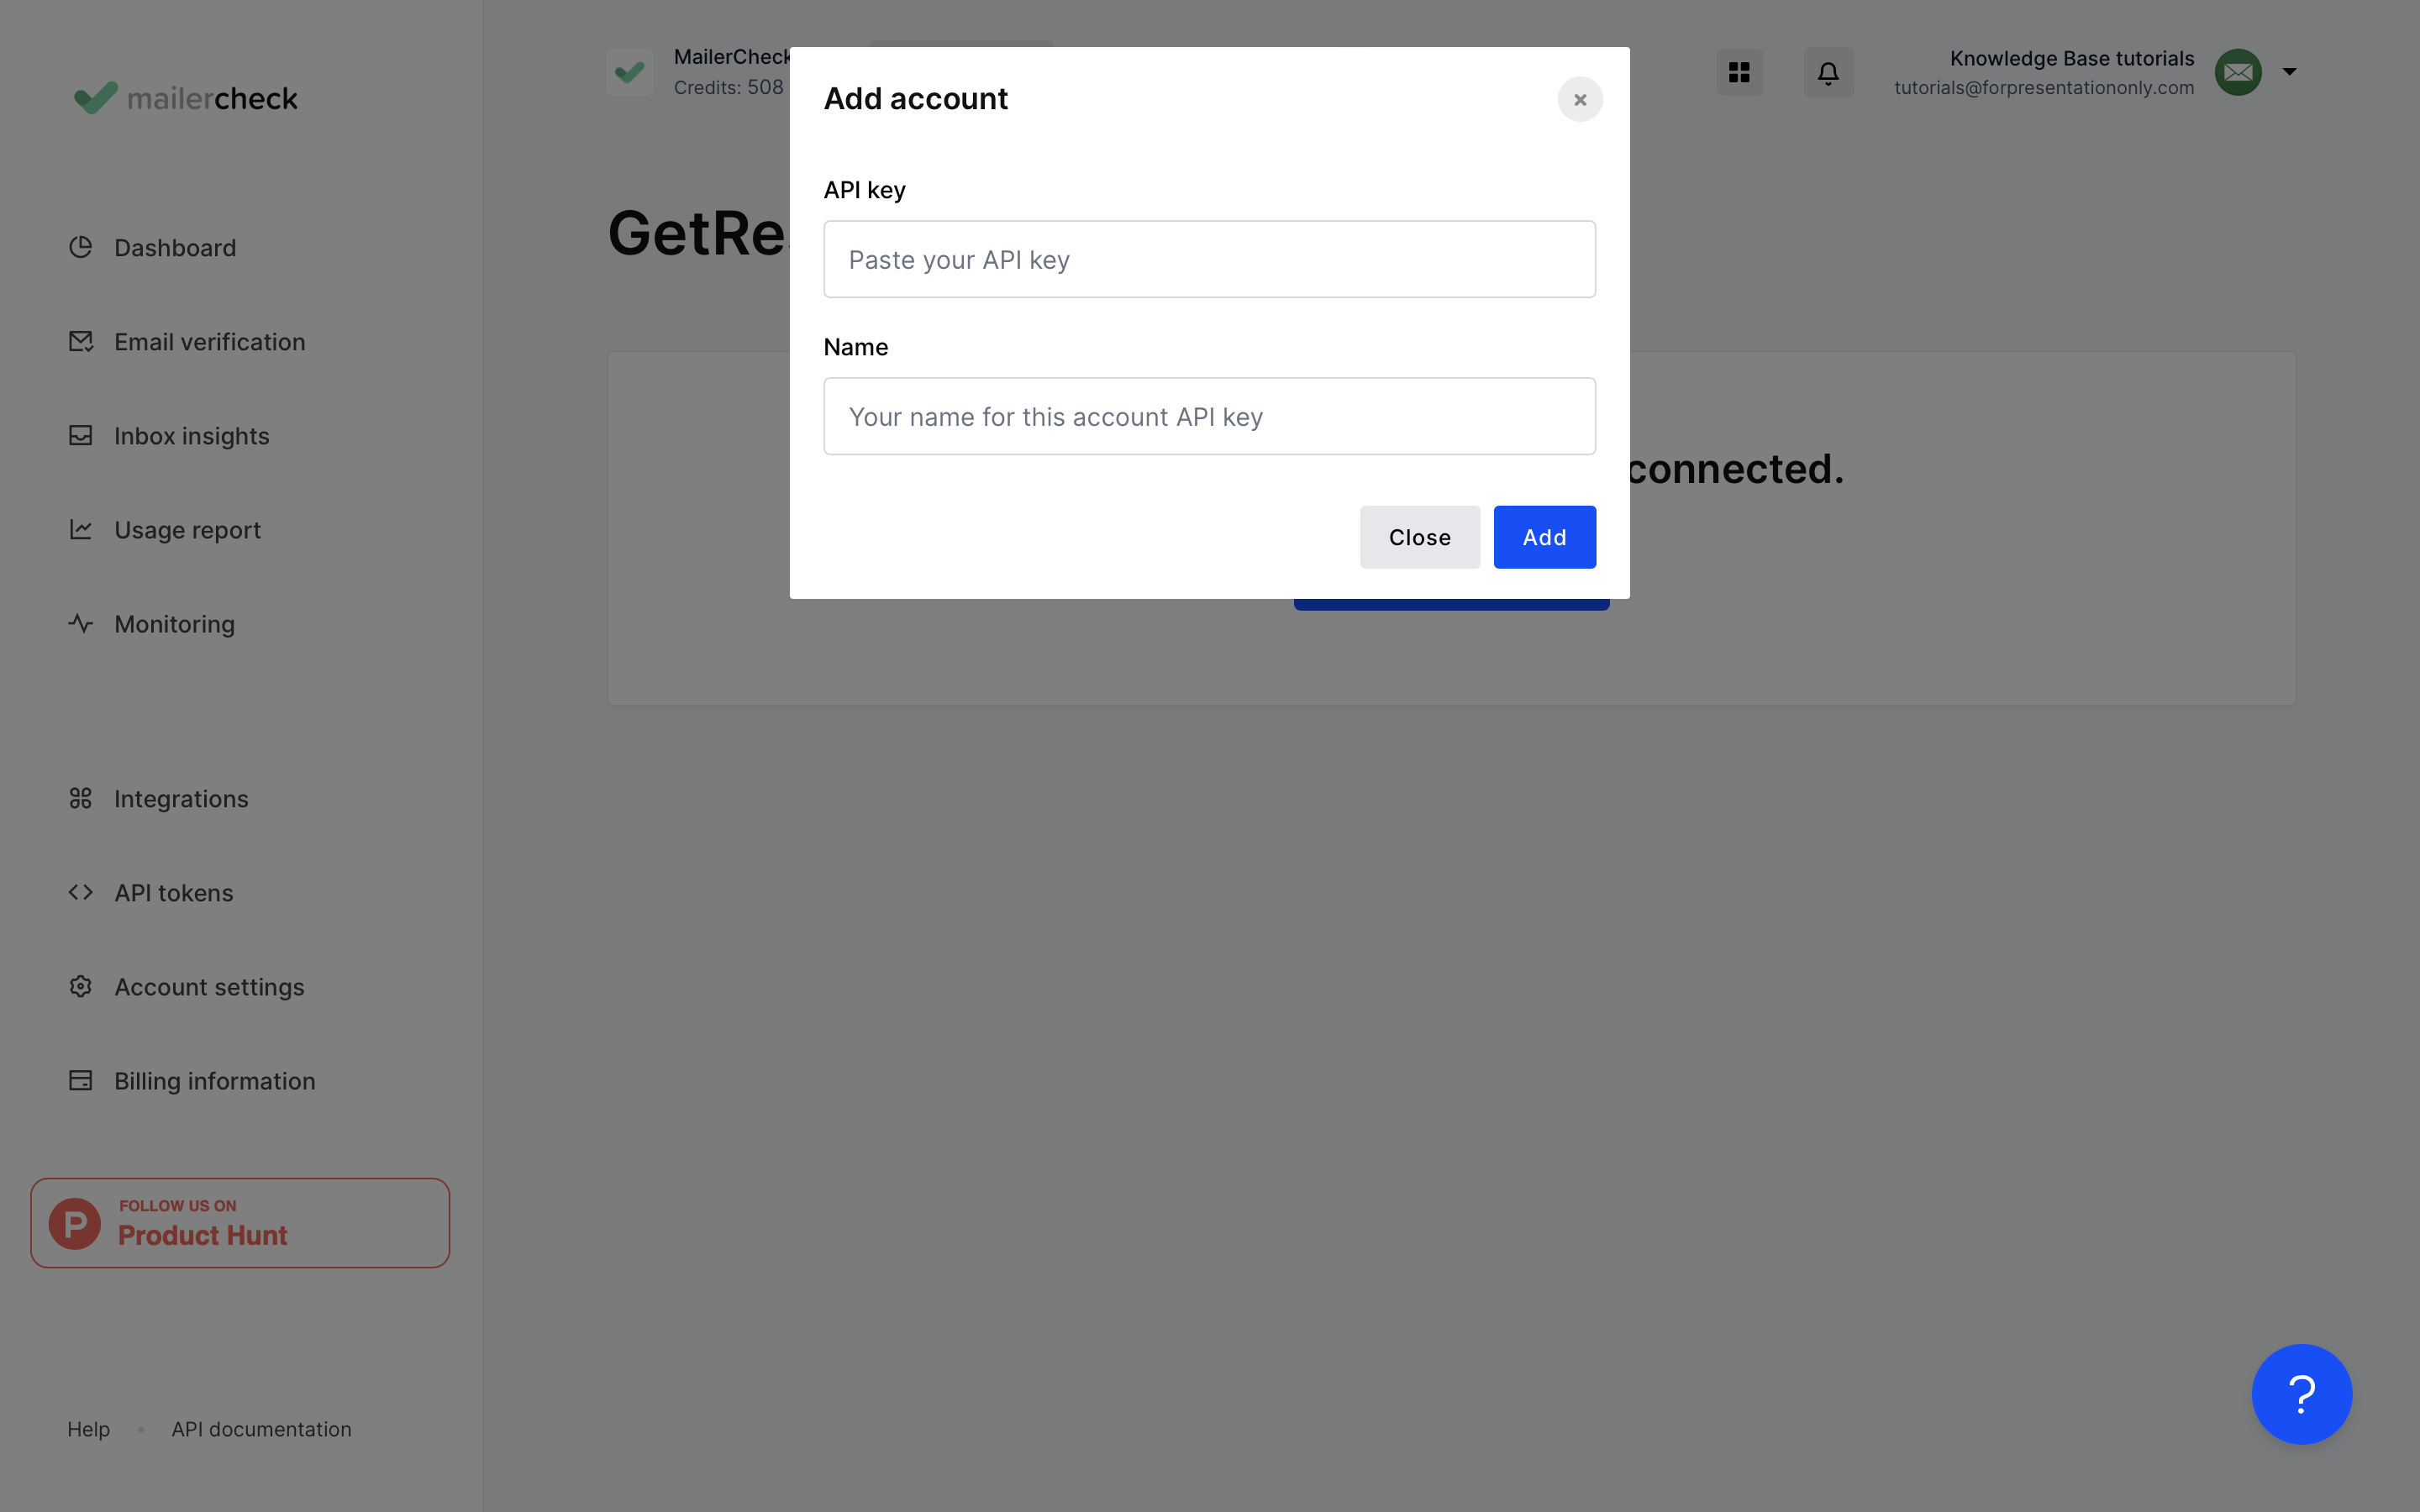
Click Connect account.
-
5
Enter your API key from your GetResponse account along with a name for your key so you can identify the account.
-
6
Click Add and your GetResponse details will appear.
Managing multiple GetResponse accounts? Add more by clicking Add integration.
To verify your lists from GetResponse:
-
1
Go to Email Verification.
-
2
Click Verify new list.
-
3
Under Integrations, locate GetResponse and click Use.
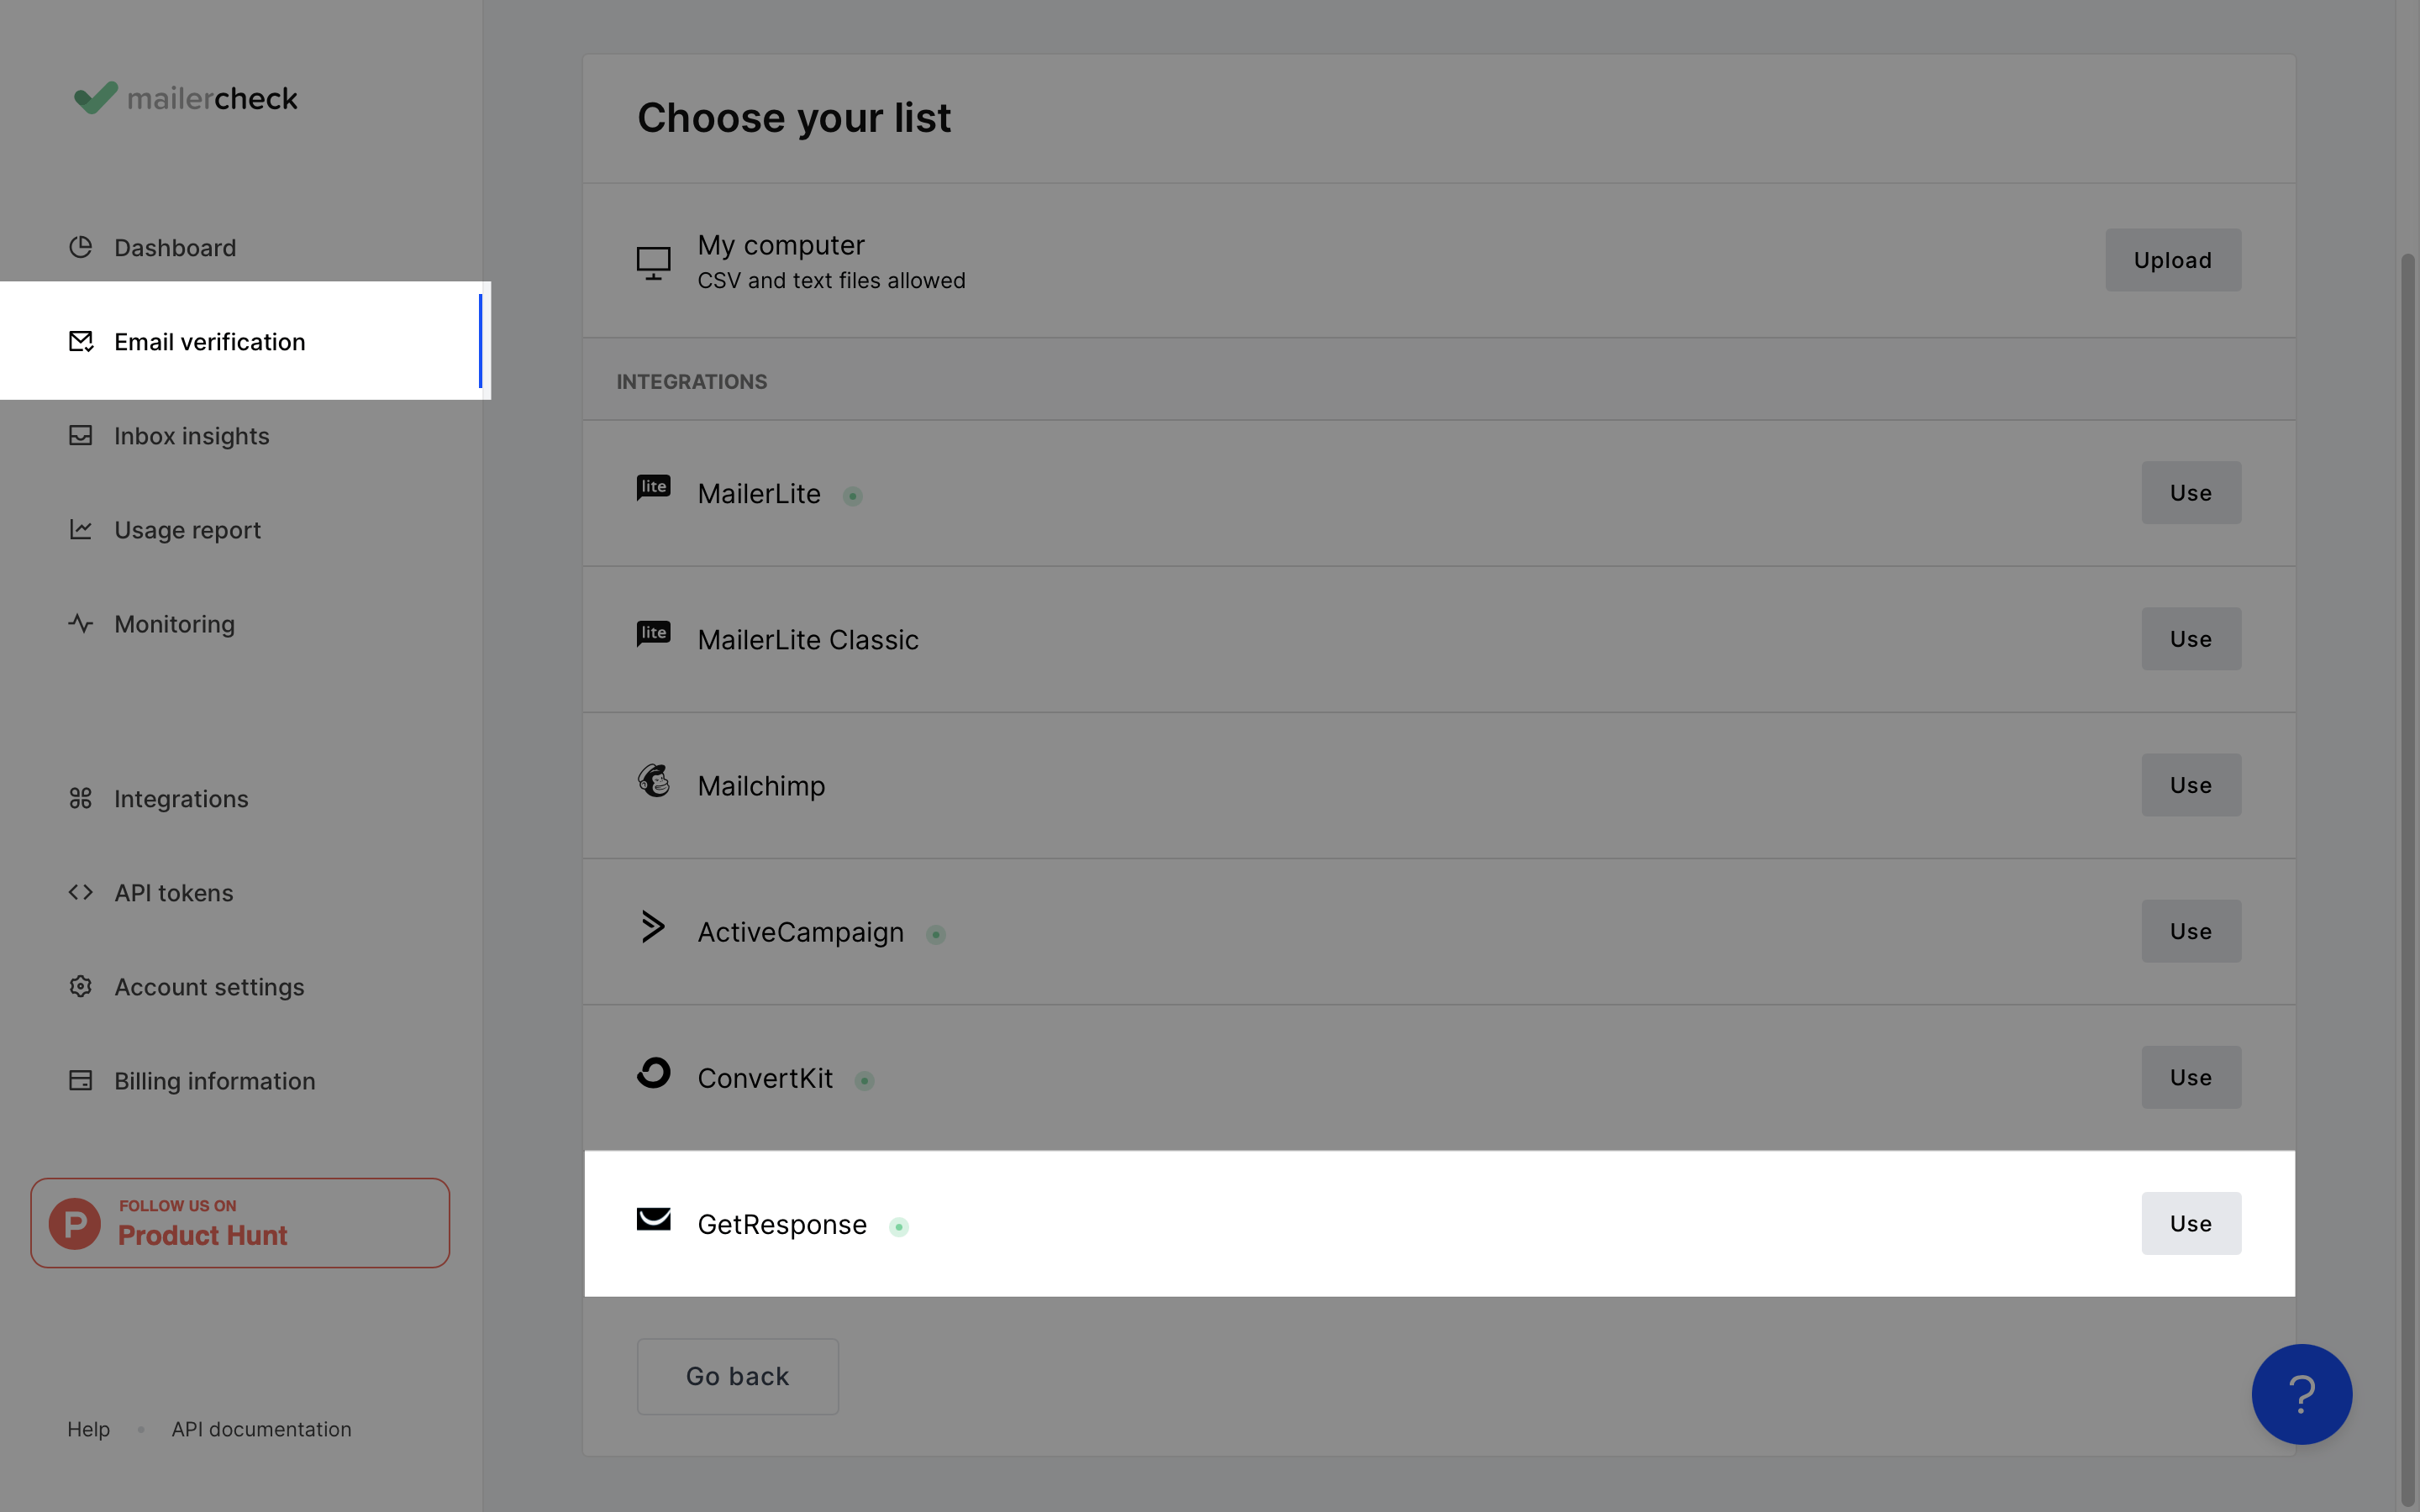
-
4
Choose the GetResponse account you wish to connect from the dropdown menu or click Add account to add a new account.
-
5
Click Authenticate.
-
6
From the dropdown menu, select the GetResponse list you want to verify.
-
7
Click Verify list.
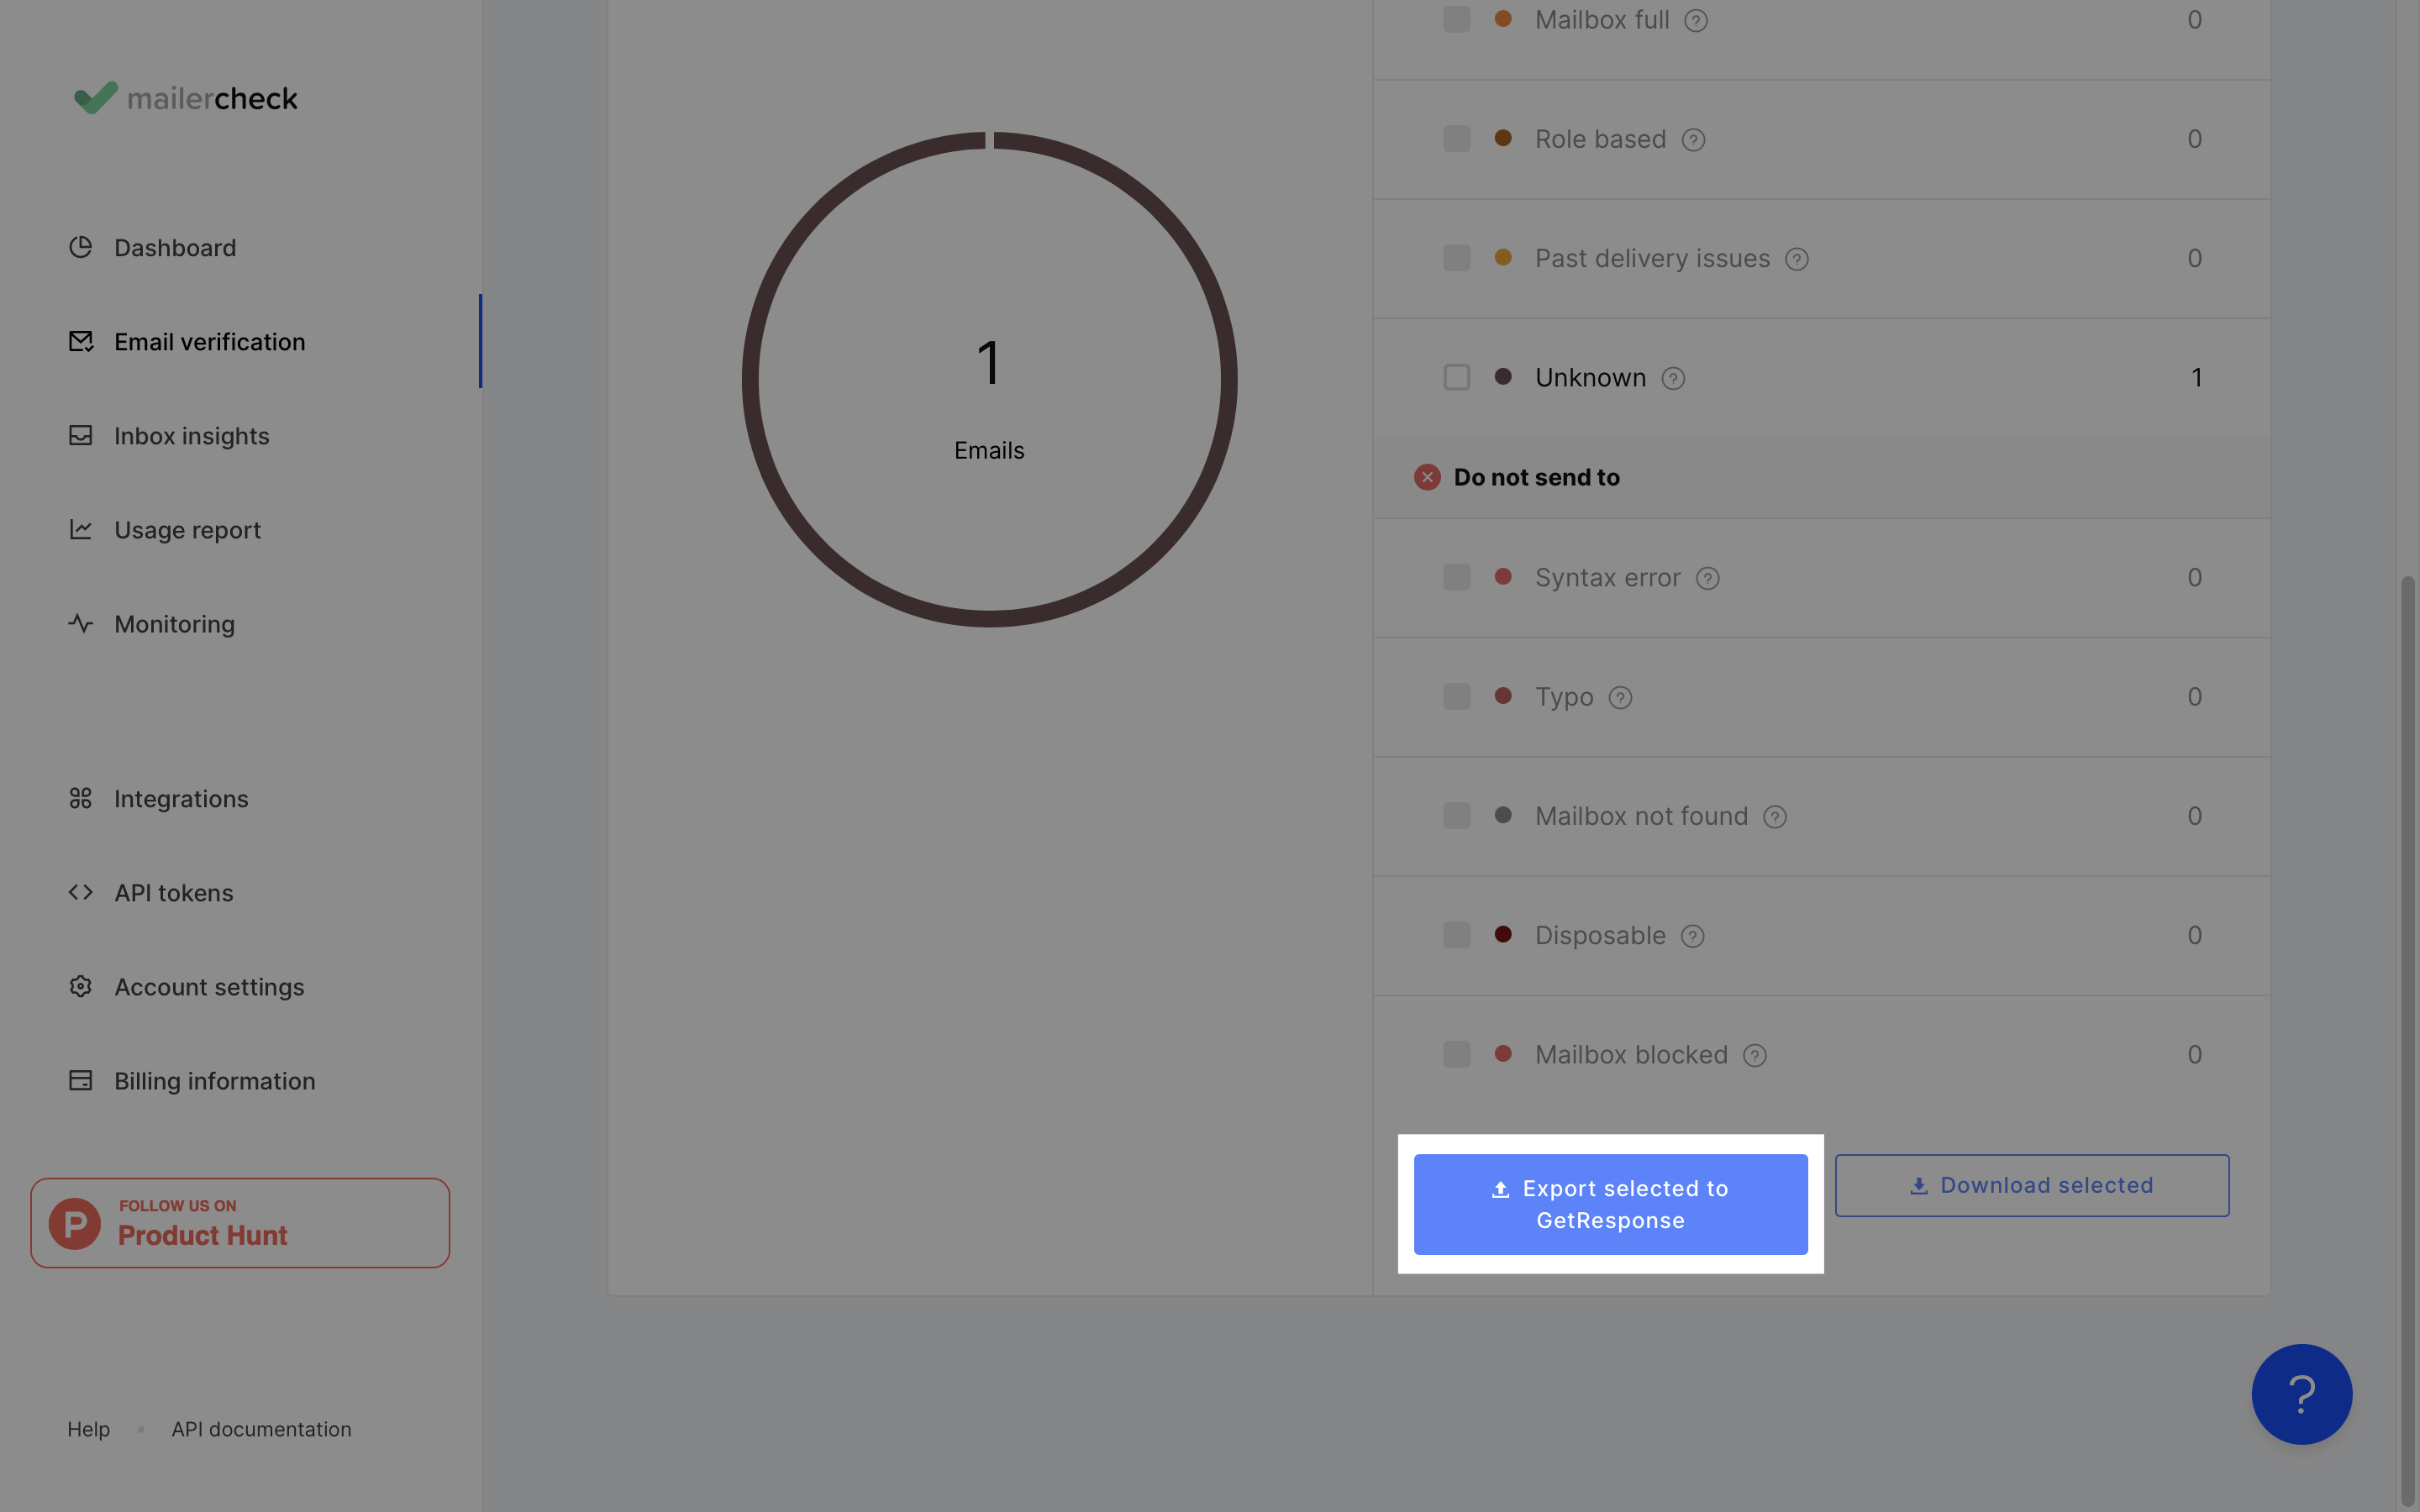
The validation process will begin and you can monitor it on the Email Verification page.
Once completed, you can view, download, or export the results by clicking View details.

Real-time API Email Verification for GetResponse
MailerCheck's Real-time API email verification is a powerful tool that can help you improve your email deliverability. By instantly validating new email addresses as they are collected, MailerCheck can help you filter out invalid addresses before they are added to your list. This can help you maintain a strong sender reputation and ensure that your emails are delivered to the inbox.
For more information on implementing real-time email validation, please refer to our API documentation.
Other MailerCheck Solutions for GetResponse Email Deliverability
MailerCheck offers a variety of features to help you improve your GetResponse deliverability:
See how your emails are being received by your subscribers across different providers with Inbox Placement
Avoid being marked as spam by conducting a spam check on your campaigns before sending with Email Insights